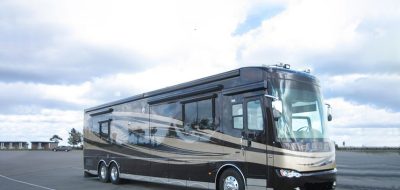
 In today’s economy, RV owners are either trying to sell their RV to reduce their month cash outlay, or are hanging on to them instead of trading them in on something “bigger and better.” Those who are keeping their RV are instead modifying them with doodads and gizmos to suit their personal needs. There are many ways to go about this and this article focuses on 10 low cost ways you can modify your RV so you can have what the RV manufacturers usually leave out.
1. Adding a 12-volt outlet – The standard 12-volt outlet is generally located near the TV connections or entertainment center of your RV and is often not very accessible. If you have kids that just “need” to watch a DVD in their bunk or you have several DC devices to charge, adding more 12-volt outlets can be a real convenience. It’s simple to do, requiring simple wiring and costs around $15. You can see an installation example here: http://www.modmyrv.com/2008/06/06/rv-12-volt-outlet
2. AC Voltage Monitor – An AC voltage or line monitor can be a real cost saver. From the simplest analog gauge to the techie digital do-it-all meter, these devices can warn you of impending electrical doom. Well, not exactly. But they can warn you if the AC voltage is too low or too high just by glancing at the meter. This can save you money because you have a chance to shut off power to the RV before low or high voltage destroys your precious electrical/electronic systems and components. A simple analog gauge can be had for about $10 and you just plug it in to an AC outlet. Here is an example: http://www.modmyrv.com/2008/06/07/rv-ac-voltage-monitor
3. Battery Cutoff Switch – This simple mod can save you a lot of grief. Having a battery cutoff switch removes any DC electrical loads from your RV battery or batteries. It can be easily placed inline between the battery’s positive cable and the battery positive post. Isolating the battery like this can prevent damage to batteries when the RV is in storage or not being used. Letting a battery run down completely can shorten its life and may even damage it beyond use. Adding a $20 switch can save you from having to by a new battery. Here is an example: http://www.modmyrv.com/2008/06/10/rv-battery-cutoff-switch
4. Satellite Receiver Cable Rewiring – Many RVs do not have the proper coaxial cabling configuration necessary for a satellite receiver connection. The reason (in most cases) is that the TV wall plate signal booster does not allow the satellite signal to pass through correctly. Making a simple bypass behind the wall plate solves this problem. And chances are you have whats needed to do this mod sitting in a box in your garage. If not, $10-15 should cover it for connectors and cabling. Here is an example of this mod: http://www.modmyrv.com/2008/06/17/rv-satellite-receiver-cable-rewiring
5. Awning Lock – The awning lock device works by preventing the awning roller from turning, even if the factory awning lock (the little lever you pull down when deploying your awning) fails. It works by pinning the roller in place using, well, a pin. The spring-loaded pin is mounted to a bracket that is installed under the awning roller. A small hole is drilled in to the roller for the pin to go in. When you want to deploy the awning, simply use the awning pull rod to pull the pin out of the roller. Rotating the “D” ring on the pin lock 90 degrees prevents the pin from going back in to the roller. Costs about $20-25 and takes just minutes to install. Here is an example: http://www.modmyrv.com/2008/06/24/rv-awning-lock
6. Bumper Hatch – If you never want to lose your rear bumper rubber end caps again, then this simple mod is for you. Although the bumper end caps generally have a little nub on the top and bottom that fits in to the holes on the end of the bumper, the caps are notorious for falling off. Your sewer hose now has the freedom to scare the people behind you. Installing the bumper hatch is easy. The kit you can buy comes with two hatches and some screws to secure the hatches to the bumper. A set of 2 costs about $15. Here is an example: http://www.modmyrv.com/2008/06/27/rv-sewer-hose-bumper-hatch
7. Drip Rail Extensions – Don’t you just love those unsightly black streaks on your RV from the water dripping off the roof and running down the sides? This is caused by two things: the dirt and grime accumulated on the roof over time that is washed off by water, and the drip rails where the water is channeled which by design doesn’t allow the water to drip far enough away from the side of the RV. Drip rail extensions help solve this problem. They are very simple to install and cost around $8 for a pack of 4. Here is an example: http://www.modmyrv.com/2008/07/01/rv-drip-rail-extensions
8. Furnace Screen – The external furnace vent openings are inviting holes for critters to enter and nest in. Mud daubers, wasps, mice and small birds are only a few of the various types of creatures that will find these openings and make themselves a nice little home, especially if you store your RV and don’t use it for awhile. Over time, this can block the vent openings and thus render your RV furnace, at worst, unusable. The furnace screen (or mud dauber screen as it is often called) mod is just the solution to this problem. Fabricated out of heavy duty stainless steel, it fits perfectly over your RV furnace vent pipe opening located on the side of your RV, and prevents anything from getting in. Costs about $15 and snaps right on. Here is an example: http://www.modmyrv.com/2008/07/15/rv-furnace-screen
9. Key Rack – “Honey, do you know where the keys to the RV are? I left them on the counter right here.” Sound familiar? The key rack mod is such a simple but very practical mod. It will have you organizing your key storage in no time so you won’t feel stupid when you find that the keys were in your hand all the while you were searching for them. You can use anything from brass hooks to velcro to a nicely styled wood or metal rack. Cost for this mod can be as little as a few bucks to $30 and takes just a few screws to install. Here is an example: http://www.modmyrv.com/2008/08/01/rv-key-rack
10. Satellite Dish Mount – There are many solutions to this mod but a very inexpensive way to mount your satellite dish temporarily to the side of your RV is by way of a 4-way suction cup mount. The dish mounting frame flange is attached to the suction cup mount using u-bolts. The 4-way suction cup is available from Harbor Freight for about $12 and u-bolts should go for no more that a few bucks. Here is an example of satellite mounting options: http://www.modmyrv.com/2009/04/28/rv-satellite-dish-mount
This is by no means an exhaustive list of inexpensive mods. There are so many more creative RVers have done so wander on over to ModMyRV.com and get your fix!


Mark Henderson
Hello! I have a Zoom 723QBT trailer… it is great, I tow with a Ford F150. One thing I have noticed, however, is that the tires (‘Power King’ brand) are virtually biodegradable. The trailer has hardly any miles on it, but the tires have cracked and dried out so much that they must be replaced already. They are expensive too! Does anyone have an idea how to extend the life of their tires? I appreciate any insight!!
Mark Corgan
Jessie, although I am not the blog admin, I went ahead and deleted the comments you referred to. I am the author of the article and was not aware of these comments but I was able to remove them. The blog admins however should be monitoring this stuff!
Jessie Lavender
I am appauled, was reading comments on the 10 Low cost mods for your rv when the last two items I saw was about free pron site and free teen porn sex videos. How can a club like Good Sam condon such actions. Please delete them from this site, thanks.
KATHY BOWERS
I HAVE REPLACED THE OIL IN BOTH MY ENGINE AND GENERATOR WITH AMSOIL. THEY BOTH RUN SWEETLY AND SMOOTH. PLUS I DON’T HAVE TO CHANGE OIL AS OFTEN. AMSOIL MAY ONLY BE PURCHASE FROM A DEALER, IF YOU NEED HELP REACH ONE CONTACT ME AND I WILL HELP YOU.
AMSOIL IS A LITTLE MORE EXPENSIVE THAN REGULAR OIL BUT I BELIEVE MY MOTORHOME IS WORTH IT, IT WAS A MAJOR PURCHASE FOR ME.
ModMyRV
Great advice Joel. Always be sure to fuse the new outlet wiring with a fuse size rated for the wiring you are splicing in to, which is generally less that the the fuse size at the fuse panel. This is because other devices or lighting may use the same circuit. When all draws on that circuit are used at one time, the circuit’s fuse can blow. This will hold even more true when adding a new 12-volt receptacle to that circuit.
Joel Ashley
Just be cautious with modification no. 1, the 12v outlet. A lot of people get into trouble by making this addition and then plugging in something that draws more current than the lighting circuit wiring it’s spliced into can handle. If whatever you plan on plugging in draws more than 10 amps, generally you’ll need to consider using heavier duty splices and tieing into a heavier wire than plain lighting circuitry. Hopefully you’d be protected from the consequences of tapping under-capable wiring by the circuit’s fuse(s), but I’ve known wires and junction plugs to melt, like when someone had foolishly inserted an oversized fuse sometime previously. If the melt point is near a metal chassis component, and the then exposed copper wire shorts out against it and adjoining wires in the loom bundle subsequently also melt from that resulting heat… well, it ain’t pretty and the whole RV can become toast.
Just be aware of the limitations and the maximum potential current draw at the new outlet. To be safe, make sure a new fuse properly sized for the wire is connected between the new outlet and the splice.
Les
I have a 35 foot class A with v10 and got 8.5 mpg pulling a saturn…5000 miles
Ross tate
Question on modifications.
I have a 2008 Chateau E-450 with a V10.
8 mpg
Does adding a Banks type exhaust system actually help the milage?
Does it void the warranty?
Thanx
Patrick W. Tribbey
Any ideas on how to add back-up lights to an ’02 TIMBERLAND 29 ft’r.?? I’m open to suggestions and ideas. I had a used set of b/u lights off a 1967 VW Bug on our old ‘pop-top’ STARCRAFT——–worked well! Something QSE ~ Q uick, S imple, and E asy. (And I thought I would have more time being retired! Ha! 🙂 )
Mark Corgan
@Bruce: Great mod. What did the upgrade end up costing you?
Bruce
Just added LED tail and back-up lights to our Everest 5th wheel. Easy, inexpensive, and cool looking.