
 I received a question from a concerned RVer the other day that went something like this; “My neighbor just paid an expensive repair bill for water damage on his RV and I would like to know what I can do to prevent this same thing from happening to me?”
One thing is for sure, if there is a way for water to get in your RV it will find it. Water leaks on an RV can cause extensive damage and can be extremely costly to repair. To protect your investment and your wallet you need to take the time to REALLY inspect for water leaks. The outside of your RV may look fine but the internal damage caused by water over a period of time can result in the entire roof, floor or wall rotting away without you even knowing it, until it’s too late. You should inspect your RV for water leaks twice a year at a minimum, and especially prior to storage if it will be stored outside.
Here are a few things to look for during your routine inspections.
* To stop a leak before it starts thoroughly inspect all roof and body seams. Reseal any seams or sealants that show signs of cracking or separation. Consult your RV dealer for sealants compatible with different types of materials.
* Look for any discoloration, and feel for any soft spots on the ceiling around roof vents, air conditioners, TV antennas, plumbing vents, and any other openings that were cut in the roof. Soft spots are an indication that water damage has already started. Find the source of the leak and have it repaired immediately.
* Look for any discoloration or wrinkles in the wallpaper, and feel for any soft spots on the walls around all windows, doors, slide outs, or any other openings that were cut in the side walls.
* Identify the location of items like the water heater, furnace, outside shower, potable water fill and city water inlet on the outside of the RV and then access those areas from the inside of the RV. Look for any indications of water damage around these openings.
* Open all overhead cabinets and look in the top corner where the walls meet the ceiling for any discoloration and feel for any soft spots. This would indicate a leak at the seam where the sidewall and the roof attach.
* Check in all outside storage compartments for any indications of water leaks or water damage.
* Check for any soft spots on the roof itself especially around the roof seams at the front and rear of the RV. Thoroughly inspect all sealants on the roof around every opening.
Caution: Be extremely careful when working on the roof of your RV, a fall can cause serious injuries, or be fatal. Not all roofs are designed to be walked on. It may be necessary to use 2X4 foot sections of 1/2″ plywood to distribute your weight over the roof rafters.
* Some Class C motor homes are notorious for leaks in the cab over bed area. Look for any signs of discoloration and feel for soft spots. Remove the mattress and feel for water.
* If your RV has fiberglass sidewalls look and feel the outside walls for any signs of delamination. Delamination is caused by water getting between the exterior fiberglass and the sidewall. When this happens the exterior fiberglass separates from the sidewall of the RV. You can stand at the front or rear of the RV and look down the side for any noticeable ripples or what looks like a bubble. You can also press on the sidewalls. If you feel the exterior fiberglass move it is delaminating. Many times delamination starts where an opening was cut in the sidewall of the RV. Have any noticeable damage repaired immediately!
The key to preventing water damage on your RV is to perform these inspections on a routine basis and to discover and repair any leaks while in the early stages. If you don’t feel comfortable performing these inspections have an authorized service center do it for you.
To watch a video on inspecting for water leaks click here
Happy Camping,
Mark Polk


Jake
Just like it’s important to waterproof your RV, you should also make sure your home is nice and waterproof. Basement waterproofing Utah is so important. It doesn’t take much moisture to start seeing signs of mold.
Pepwaterproofing
A Pep Basement Waterproofing & Foundation Repair service of Columbia Mo is an excellent BBB rating company which provides 100% satisfaction guarantee!
news
really great ideas. but as it is for water damage with the insurance? is possible to take extra safeguard or to book an additional insurance? and you have maybe a list of craftsmen make the price worth it? would be very helpful
Water Damage New Port Richey
Thanks for sharing some great tips.
Keith Meicher
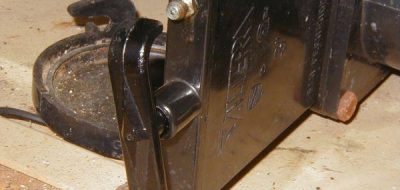
I have a water damage issue I am hoping someone can comment on and suggest a solution. I have a 1996 Elkhorn 9T truck camper. It looks like in the past the water heater may have been failing or had a leak that has rotted the wood that makes the underside overhang portion on the drivers side of the camper. This has made the hold down eye bolts unstable on that side both front and rear, but more so on the front. Is the back side of this portion a truck camper framed in metal,and should the old wood be cut out and replaced with some treated 3/4 plywood? Would it be better to replace this with steel plate? I just do not know for sure what is behind this wood without cutting out and it would be helpfull if someone could help with some insight. Any suggestions would be appreciated before I open that can of worms.
Thanks. Keith
Charlotte Kalkofen
I have water stains on the ceiling of my RV. It is a fabric ceiling and I don’t know what to do to make these stains go away now that I no longer have a leak. I would appreciate suggestions.
Jim Flannery
Don’t forget to check the rubber boot on the TV antenna where the wire goes into the roof. The boot tends to work its way up the wire causing a leak.. I always put a tie wrap on the wire to prevent this. You might also seal the bottom of the boot with the proper sealant.
Gerald Strickland
Al Paschen has it right. I have a 2006 Newmar Ventana and I inspect it at least twice a year and have never found a visible problem until this month when I discovered a damp spot on the bedroom carpet. I took it to an RV repair shop and they recommended the pressure test. It found the source of my known leak and also showed that three of my windows were leaking (although there were no observable indications). From now on, I’m having the pressure check occasionally just to be safe.
Jack King
Check window weep holes for blockage. That is where my leak started.
James Stevenson
Harbour Freight and Home Depot sell water leak detectors that are battery operated and can be placed almost anywhere as they are quite small in size.They are very sensative to water and emit a loud squeeling sound when water is near them.Just puting them in the palm of you hand will set them off.I’ve got them under my sinks and in the crawl space in the RV where the shore water comes in and by the hot water tank.Twice in the 2 years I’ve been using them they have saved me from a potentially expensive leak.
Gary Hill
I have a 2001 Tradewinds (yep an Orphan) and would like to know if you can point me to or if you know how to repair a crack in the exterior wall at the corner by the rear slide out? I’m not sure how to procede as I would like to do this myself if possible due to cost of having someone do it for me and I don’t have very good faith in other people doing a good job. Some bad experiences with repair work. If it is possible respond to my email address.
Thanks
Gary Hill
[email protected]
Dan Puroclean
Great advice – thanks. Be sure that if you do have water damage that you get it taken care of quickly. The expensive repairs are required when water damage is left and mold grows.
Casey Donovan
A great defense against water leaks, or repair if it occurs, is Eternabond Tape. This material sticks to just about everything except silicone, is completely waterproof, and appears to last forever. Use it over weathered seams, around roof openings, and under external fixtures like clearance lights.
Al Paschen
Another precaution that may be worthwhile before winter storage would be to take your RV to a dealer that can perform a “Seal Tech” Leak Test. This process pressurizes the RV slightly so that air leaking out of leaky seams will make soap bubbles on the outside of the RV. It can detect leaks before the water gets in and causes damage. It can also locate the source of a leak even if it is many feet away from the point where water appears inside the unit.
Norman Severin
It’s also good to look behind the couch if you have a window. The paneling looks good but when you touch , it crumbles away.