Recreational vehicle owners start to get restless as the winter season gives way to spring. It will soon be time to get the rig out of storage and back on the road. This process generally is a lot more exciting than the tasks required in prepping for winter storage. For the most part, getting your RV ready for spring takes a lot less time than fall prep. Best of all, when you’re done, you can turn the key and go!
Peek Into the Power
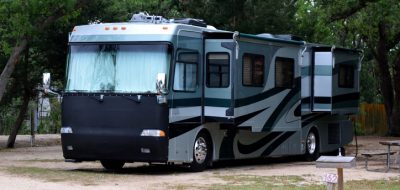
One of the first things that should be attended to is the batteries. If the unit is a motorized RV, there will be two battery sets: the chassis and the house bank. The house batteries normally consist of pairs from one set to as many as four pairs. They are 12 or 6 volts each, but regardless, all wired to deliver a 12-volt service. Since these are subject to varied power loads and recharge cycles, the health of each should be verified each year. You can do this yourself or have your local service shop do it.

Photo: Camping World
Flush Out the Antifreeze
If you used RV antifreeze to protect your lines and components, you will need to flush the system thoroughly. Remove the screens that are threaded onto the tap openings and clean. Once the lines and system components are clear of the antifreeze, re-install the tap screens and any inline filter elements that you removed when you winterized the unit last fall. New elements should be used.
Pump Check
Now let’s verify that the water system is in good order. With the water pump turned on, close all outlets. Now, while you work on other items, you can listen for any pump activation. If the pump runs briefly during this time, it is an indication that the system has a pressure leak. Inspect for leaks at joints and components and correct if applicable. If no leaks appear present, the issue probably lies in the water pump discharge check valve. If the problem is check-valve related, you can do a work-around by turning the pump on and off as needed until you can have it serviced.

Getty Images
Visual Inspection
A thorough walk-around should be done to confirm that no physical damage occurred during the layup. At this time, the pressure of each tire should be verified and topped up, if required. Some pressure loss can be expected, but all should be uniformly down with slight pressure loss. If one or more appears substantially different, further investigation may be needed.

Getty Images
Check Fluid Levels
Check all fluid levels and verify that the engine fan belts are clear of any obstructions. If you have a diesel pusher with an Allison transmission that is equipped with the electronic oil level feature, be sure to check it once the running gear is up to normal operating temperatures. This feature, as stated by the manufacturer, is far more accurate than the dipstick method. If the unit is equipped with air suspension, be sure to confirm the unit is at ride height after starting up prior to moving.
Once the RV has been moved from its spot in the storage facility or parking space, an inspection of the footprint of where it sat will reveal any leaking fluids or perhaps other abnormalities.

Getty Images
Go on a Shakedown Cruise
With everything completed, including the normal after-storage items, a shake-down cruise is probably in order. This is a short trip that involves the operation of the vehicle as well as all of its critical components. While some folks combine this with their first camping trip, I prefer to do it well before. After all, if there are any issues, they can be addressed immediately and not interrupt an otherwise good camping outing.
During this test run, we want to verify that the brakes are working well, with no pulling to the side or abnormal vibrations. Check that the dash instruments are all reading within their normal values. Test the exhaust or compression engine brake if so equipped.
Engine Insights
After the short shakedown trip, the engine oil and the coolant level should be rechecked when it has cooled down. While no visible leaking usually indicates sound engine condition, it is possible for the transmission oil, engine oil or coolant to leak internally from one to another. Also, recheck the oil levels of any axle wet hubs if so equipped. The seals in these hubs can seep and fail after an extended period of non-use time. Additionally, inspect the inside and outside of the wheel and tires for any seepage from hub housings.

Pexels
Clean, then Cruise
Well, apart from cleaning your mobile cottage inside and out, you should be ready for your first camping trip of the year. With care and the necessary regular maintenance required for your rig, you hopefully will enjoy an uninterrupted camping season. At least until it is time once more to head it to the barn for another winter’s rest.
This is the fun part. Use Good Sam Resources like the Good Sam Trip Planner to chart your route, and take advantage of great savings at Good Sam Parks along the way. Consult a checklist to make sure you’ve got all the essentials for living on the road.
Adventure awaits as you cruise into another chapter of traveling North America’s scenic highways and byways. Enjoy!
Peter Mercer — With the Dawning of a New Season