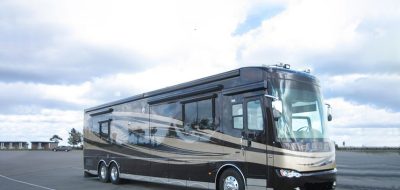
 The sun slants in through the window blinds as you sit down for breakfast in your RV. It picks out the glistening scarlet tomatoes, deep green herbs, and bright yellow peppers that fill the omelet on your plate. Behind you fresh strawberries spill out of a container that dangles from the ceiling, filling the space with their summery smell.
WAIT A MINUTE-IT’S THE MIDDLE OF WINTER, you’re on the road, and you’re eating fresh produce you picked this morning. Sound too good to be true? A growing number of RV gardeners will tell you that this picture can be your reality. With the ease of container gardening, a vast range of plants-vegetables, fruits and herbs can be grown in or near your RV, and you will reap the benefits.
Homegrown Advantage
And those benefits are countless. According to the US Government Health and Nutrition website, choosemyplate.gov, side effects of eating fruits and vegetables may include reduced risk for heart disease, cancer, diabetes, obesity, high blood pressure and bone density loss. Naturally low in calories and high in fiber, nutrients, and important vitamins, vegetables are essential in maintaining or achieving health. Fruits also help satisfy a sweet tooth, which can aid in weight loss or maintenance.
As for fresh herbs, learning to cook with them can revolutionize your experience in the kitchen. The addition of fresh cilantro to the above omelet, for example, brings a piquancy and delicacy to the heavy egg flavor. Also, plants in the small interior of your RV can lighten your spirit on long road trips and help you breathe by cleansing the air. An added bonus is that giving away produce is one of the best ways to make new friends.
Container Gardening
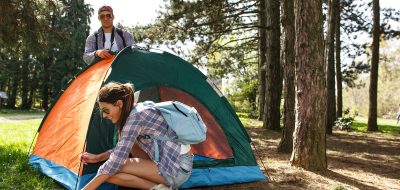
Advantages include portability, ease, variety, and total control of variables. Sherry Himes, owner of Green Street Market in Clinton, Missouri, says, “Container gardening is a wonderful thing-it’s easy to do, and you can control every factor including the chemical content of the soil, if you’re trying to go organic.” You can set your garden out on the sunny side of your campsite anytime you stop rambling, or fasten the containers down and enjoy them on the road. A Topsy Turvy grower (visit topsygardening. com) will let you sprout several kinds of herbs in one planter, and has the added advantage of minimizing plant litter, since it’s a self-contained system. Containers can be as small as jam jars or as large as 5-gallon buckets, and can be made lighter with the addition of packing peanuts or heavier by including a layer of gravel or lava rock in the bottom. As long as you follow a few simple guidelines, the prospects are endless.
Watering, Drainage and Fertilizer
Making sure your plants have the right amount of water is essential. Jeff Wilson, Horticulturist & Grounds Manager at Ocean Lakes Family Campground in Myrtle Beach, South Carolina, says, “Most plants will not grow well in soil that is always wet, and plant roots need air space in order to grow properly. Pots made of clay or wood breathe naturally, allowing air in and moisture out. Other types such as ceramic and plastic hold water longer but don’t allow for air exchange.” Always allow for proper drainage, Wilson recommends, and if there are no drainage holes present, make some in the bottom of the container. When using expensive ceramic or decorative types that can’t be drilled, try using an insert in the bottom of the container to add drainage.
Keep in mind too, that smaller pots require more watering. Wilson says, “Due to the very limited amount of soil, and the fact that it is so porous, the plants will need to be watered and fertilized more often than plants growing in the yard. Watering properly can be tricky. The best thing to remember is just try to keep the soil consistently moist. Plants will wilt when soil is too dry, or begin to rot if too wet.” Try mixing water-ab- • ~ sorbing gels with your soil, before wetting. These gels absorb ‘ and hold water, allowing you to water less often. . Also, Himes says, “you can save money by watering your plants with your dishwater-just make sure to use an organic dish soap and don’t wash any animal products, like fat.”
Once you’ve got your watering schedule down, fertilize your plants. Different plants have different fertilizer needs: for example, faster-growing plants such as vegetables should be fertilized weekly or biweekly. Gardening books and seed packets give good information on fertilizer requirements; you can also mix slow-release fertilizer in the soil before planting.
Soil Quality
Himes points out that quality potting soil is essential. “When you’re doing container gardening, you want something that’s going to be sterile, weed-free, insect-free, and disease-free. If you add old soil to your pot, you’re introducing these things, which means you’ll have to introduce more chemicals to get rid of these factors. If you start with good pure soil in the beginning, you eliminate that chemical cycle.” The potting soil should be a mixture of peat, shredded bark, vermiculite and/or perlite.
Light Requirements
The last piece of the container garden puzzle is light requirements, which you can learn from plant plant labels, observing how your plants respond to light, and asking other gardeners. Wilson says, “don’t mix plants together in containers that have opposite light requirements—one plant needing full sun and the other needing regular shade.” One of the best aspects of a container garden is that you can move your plants as much as you like until you find the perfect mix of sun and shade.
What To Plant?
Himes says herbs like basil and rosemary always do well in containers, and she recommends avoiding sprawling plants like mint. “The great thing about herbs is the more you use them, the more they grow,” she says. “Swiss chard or lettuce mixes labeled ‘cut and come again’ are excellent for containers because you can harvest them and they’ll grow right back.” Use tomatoes that are container specific, such as Super Bush, and go wild with peppers because almost every variety will thrive in a container. Ever-bearing strawberries are perfect for the Topsy Turvy planter, because the runners can dangle.
Aesthetically, Wilson advises that you choose plants that are in scale with your container. For color, think about the foliage, the flower, and the containers themselves. “The best looking containers use analogous or complimentary colors on the color wheel to achieve the WOW factor,” he says. “Also, use the design principle of having a Thriller, a Filler and a Spiller when planting mixed containers. Various colors and/or textures can be used for almost unlimited combinations.”
Using Your Bounty
So you’ve selected your plants carefully, watered, fertilized, and overseen light requirements—and they’re producing like crazy! What do you do with the produce?
Well, if you are stationary and have the equipment, the old-fashioned solution of canning is cheap and preserves produce like tomatoes in top condition, though it can be time-consuming and hot. Freezing, if you have the space, works for everything from corn to peppers to strawberries. If you’re parked, giving your bounty away is a great way to become acquainted with neighboring RVers and may gain you friends for life. But the best solution to this wonderful problem is using it! Below are two recipes for using fresh tomatoes. One uses fresh basil and the other fresh cilantro, both herbs you can grow yourself.
Container gardening is the perfect way to introduce fresh produce into your diet and a method of gardening that allows for all the flexibility required by a life on the road. By paying attention to factors like watering, drainage, and fertilizer, soil quality and light requirements, you can be on your way to enjoying home-grown veggies, fruits, and herbs at home in the comfort of your RV!
Homemade Bruschetta
Recipe makes 2 servings, 10 minutes max
2 washed ripe red tomato, diced in .” cubes
1 4” washed sprig fresh basil, torn
1 clove fresh garlic, divided
4 teaspoon olive oil, divided
4 slices French bread
Toast the bread on a griddle. Meanwhile, combine the tomatoes, basil, . the garlic (pressed), 1 teaspoon
olive oil, and add a dash of salt and pepper to taste. When the bread is finished, rub the remaining garlic on the surface, drizzle with the remaining olive oil, then mound the slices with your tomato mixture.
Salsa Fresca
Recipe makes appetizer for 2, 10 minutes
2 medium to large red tomatoes, diced in 3⁄4”-1⁄2” cubes
2 green onions, chopped up the stem until it begins to separate and then diced
2 Tablespoon chopped fresh cilantro
1 clove fresh garlic, pressed
1 jalapeno or sweet pepper, seeded and diced into very small pieces
Juice of 1 lime
Dash of cayenne, black pepper, sea salt. Mix all ingredients together. Store in refrigerator for several hours before serving to allow flavors to meld.


