
Here’s a sample of the checklist I use when arriving at a site and unhooking.
OUTSIDE TASKS
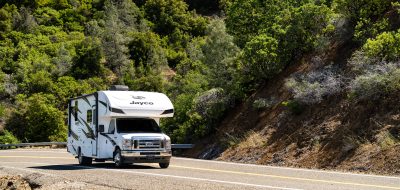
1. Position trailer at campsite.
2. Put doorsteps down.
3. Position door handrail for entry use.
4. Unlock & open trailer door.
5. Move pets to trailer.
6. Test campsite water hookup by opening & closing campsite water valve.
7. Test electric power with multi-meter.
NOTE
If campsite hookups are not working, find out if another site with working
hookups is available before continuing with RV Camp Site Setup.
8. Install trailer wheel locks & stow handle.
WARNING
Never connect the electric cable with campsite electric hookup circuit
breakers turned on. Personnel injury may result if circuit breakers are ON
during electric cable hookup.
9. Perform the following steps to connect trailer to campsite electric hookup.
- Set all circuit breakers to OFF in campsite electric hookup panel.
- Connect electric cable to connector at right rear of trailer.
- Connect electric cable to the 50-amp connector at campsite electric hookup panel.
(If a 50‑amp receptacle is not available, use 30-amp adapter cable to connect to 30-amp receptacle on campsite electric hookup panel.) - Set circuit breakers to ON at campsite electric hookup panel.
10. Position jack support wood pads under front trailer jacks.
11. Pull out lock pins from trailer jacks & allow jacks to drop on to the wood pads.
CAUTION
The full weight of the trailer rests on the lock pins, so verify that both lock pins
are fully engaged into the jack-legs.
12. Slightly raise jacks until lock pins fully engage into trailer jacks.
13. Unlock and open front jack control panel door.
NOTE
Raise the trailer by extending the front jack-legs.
Lower the trailer by retracting the front jack-legs.
14. Using electric switches, EXTEND front trailer jacks until they are resting firmly on wood pads.
15. Continue EXTENDING trailer jacks to a COUNT of 18. (This should allow for a smooth trailer un-hitching.)
16. Lower truck tailgate.
17. Un-plug & stow trailer electric cable from truck.
18. Remove padlock from truck hitch.
19. Stow trailer breakaway switch cable.
20. Open truck hitch latch bar security latch.
21. Attach padlock to stationary part of truck hitch security latch and lock padlock.
NOTE
If hitch latch bar cannot be easily pulled out, the weight of the truck is causing
pressure between hitch jaws and trailer kingpin.
To remove pressure from hitch jaws, back truck tighter towards trailer and
set truck brakes before removing foot from accelerator.
22. Pull truck hitch latch bar fully out so that it opens the hitch jaws and allows trailer kingpin to disengage from truck hitch.
23. Slowly drive truck forward until it is a few feet in front of trailer.
24. Raise truck tailgate.
25. Push hitch latch bar into the closed position so that hitch jaws close.
26. Leave hitch latch bar security latch in the unlocked position.
27. Move truck mirrors to the IN position for use without trailer.
28. Level trailer as necessary with front trailer jacks.
29. Close & Lock front jack control panel door.
30. Lower both rear trailer-stabilizing jacks until they are firmly on the ground.
31. Stow jack crank handle.
32. Install trailer kingpin-stabilizing jack & attach spread limiting chain.
33. Set jack control lever to up position & jack up kingpin-stabilizing jack until it is firm under trailer kingpin.
34. Stow jack handle.
35. Connect “Y” hose adapter to campsite water system hookup.
36. Connect trailer fresh water system to “Y” hose adapter on campsite water system hookup with a white fresh water hose.
37. Open ball valve on fresh water hose side of “Y” hose adapter.
38. Set Trailer Water Selector Valve to City Water Fill/Operation. (Arrow points UP)
39. Open hose valve on the trailer fresh water hose connection.
40. Connect flush hose to “Y” hose adapter on campsite water system hookup.
41. Close valve on flush hose side of “Y” hose adapter.
42. Open hookup water valve.
43. Connect water flush hose to trailer sewage tank San-T-Flush water hose connection.
44. If sewer hookup is available, remove cap from trailer sewage outlet pipe.
45. Connect clear 90-degree elbow to trailer sewage outlet pipe.
46. Connect sewage discharge hose to clear 90-degree elbow adapter.
47. Connect red sewer adapter to other end of sewage discharge hose.
48. Connect sewage adapter campsite sewer hookup.
49. Place hose supports under trailer sewage discharge hose.
50. Open both propane tank valves.
INSIDE TASKS
51. Prepare slider units for moving to the OUT position.
CAUTION
Let everyone at your campsite know that you are about to move the
slider units before operating them to prevent personnel injuries.
52. Move bedroom slider unit to the OUT position.
53. Move main room slider unit to the OUT position.
OUTSIDE TASKS
54. Install trailer wheel covers.
55. Install foam rubber bumpers on the lower edges of bedroom slider.
56. Install bedroom slider lock-bars. (Two) (See your inst instruction manual for photos for locations)
57. Install main room slider lock-bars. (Two) if needed.
We thank the author of this checklist – Lester Evans
Happy Camping,
Fred b.


Anonymous
Really good useful info,Thanx!
tom blackburn
What are the “lock bars” referred to in this post? I have two bars used to secure the slide when it is in the IN position, but never heard of anything for the OUT position. thanks
Warren
Good Grief!
Just reading that check list was a chore. By the time you finish all those items, it would be time to start breaking camp.
Thomas Becher
If I followed that advice as a novice I’d still be at setting up Y water adapter, [never used one] lock bars? on slide’s don’t know what you’re talking about. Red sewer hose? mine’s brown. Some newbe is going to take all that litterly and be totally discussed before he’s done.
John Shelton
Ouch! I’m glad I don’t have to travel with Lester Evans. My list would be closer to this:
1) Position trailer in space as level as possible.
2) Connect electric cord
3) Go inside trailer
4) Turn on AC and TV
5) Sit down and take a break; fix a cup of coffee, watch a couple of TV shows and check email, etc.
6) After the sun goes down so it is comfortable outside; hook up water and finish leveling trailer.
7) Take a walk and enjoy the new scenery at a new campground.
p.s. don’t bother to unhook the towing and towed vehicle unless you are going to be at your location beyond your present grocery supply. Don’t bother to hook sewer hose etc. unless your holding tanks approach full.
Enjoy the RV lifestyle, don’t make a job or work of it.
Bobby Weeks
No.1 on my list is chock all wheels FIRST. After unhitching on a sloping grade, the whole rig with legs down just went for a stroll 5 feet or so , off the pads, bouncing off the truck bed walls and grinding into the gravel.Lesson learned .
Darthvagrant
Procedure 58: Pay for camp site