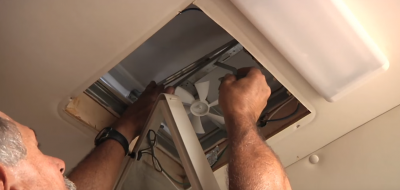
In Part I, we took a hypothetical RV excursion only to experience a generator problem. So we entered a local RV service shop only to sit there and wait, and wait and wait while the service department tried to diagnose the problem. Of the five ways to assist your RV service shop, we explored the first method, Recording All Identifying Numbers.
Here in Part II we’ll outline three more ideas that just could save your shop time while making necessary repairs. Ready?
2. Organize a Repair History of the RV
Unless this is your very first trip after purchasing your recreation vehicle, you probably have gathered an assortment of papers, warranty forms, repair invoices, etc., for things done on and to your coach. If you are like most people, you’ve lost some, stuffed some in a storage compartment or glove box, even allowed some to be washed and dried while in your shirt pocket, and maybe put some in a box somewhere subconsciously thinking you might need them someday.
Try to develop a plan for the safekeeping of these documents. At the very least keep your repair order and installation receipts in a three-ring binder arranged in chronological order. Again, they may provide a clue that will ring a bell or jog the memory of the service writer. If he quickly scans your repair history and finds a specific failure pattern for a particular device that relates to your current problem, it may help speed up the repair time in the shop. Besides, it is felt by some that a detailed and chronological record of repairs and services adds to the resale value of the RV when you decide to trade up. It shows you have taken care of your coach.
3. List All Add-on Components
Similar to the previous item, this one suggests you maintain a list of all aftermarket accessories that have been installed on your RV. Not only does it provide a detailed accounting of how you have increased the value of your rig, it could also save troubleshooting time while in the shop. Here’s a real-life example.
A late model Class A motorhome began experiencing intermittent electrical shorts in the 12-volt DC system. Electrical shorts, as you are probably aware, are difficult to trace and repair anyway, but the diagnostic task is further complicated when the symptoms are intermittent. (Is this akin to having that toothache miraculously disappear the moment you step into the dentist’s office?)
While perusing the customer’s list of installed accessories, the service writer notices that the customer just had a roof rack with a rear ladder installed two weeks earlier; a fact the owner would have never even mentioned since it did not relate at all to the 12-volt short. He casually made a note on the repair order. The RV technician then read the note, made a deduction, attached a meter to that 12-volt circuit and started removing the screws that secure the roof rack to the roof. Sure enough, the third screw he started to remove confirmed the existence of a short. After removing that screw completely, the short disappears. He then seals the hole, (the roof rack will suffer no ill-effect with one less mounting screw), runs a few more tests, signs off on the repair order, and sends the finished coach to the outbound lane of the service department driveway. In and out in less than thirty minutes – minimum charge. Almost unheard of for any 12-volt short, especially one that is intermittent. Without the knowledge of the customer’s recent accessory installation, it may have taken hours (days?) to find that single screw partially cutting through that 12-volt wire.
4. Look for the Obvious
Once it is apparent to you that something is indeed not quite right with your coach and that it will be necessary to take it to the repair shop, do yourself a favor and perform a little inspection before taking it in. Look for obvious signs that something may be amiss. Later, during your conversation with the service writer, be sure to then mention any of these obvious signs you may have found. In fact, it is advisable to even jot the items down so they are not forgotten or overlooked. Some obvious items to look for during this inspection would include:
- Stains or discolorations
- Water pooling or dripping
- Burned wires
- Broken hardware
- Fuel dripping
- Missing components
- Disconnected or loose wires
- Cracked fittings
Labor charges were reduced by 50% on a recent repair when a customer pointed out a clump of burned wires located in a hard-to-get-to, difficult-to-see storage compartment, behind a partition, under a full-size bed. His assertiveness to “look for the obvious” allowed him to not only retain some girth to his wallet, but also put him back on the road that much quicker. The technician quickly made the repair, tested the system and sent the owner on his way.
So, couple these three with the first one last week. Next week, we’ll look at the final tip to helping your shop.
Gary Bunzer, the RV Doctor


Pingback: penrith stone facing
Pingback: 5 Ways to Assist the RV Service Facility - Part 1
Pingback: rx4rv.com