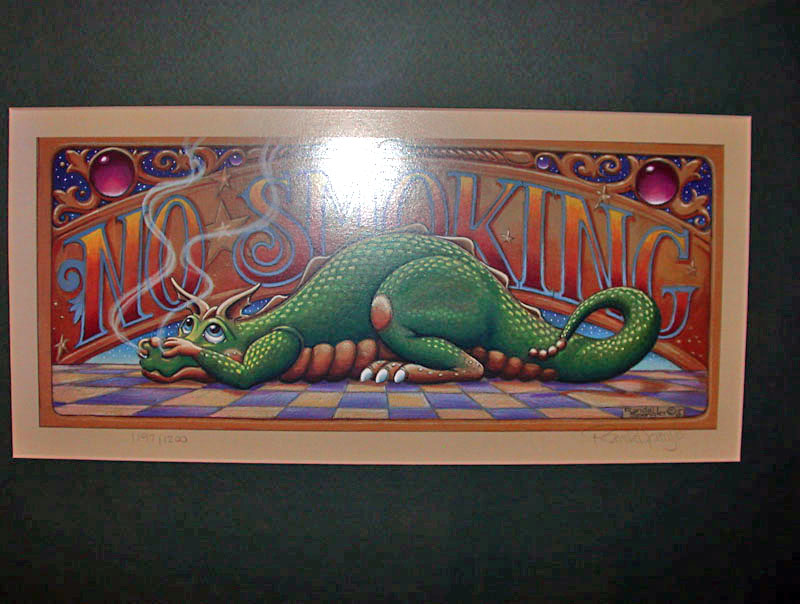
Although most of us take pictures of scenery, family & friends, there are times it is useful to use your camera to take pictures of pictures. A scanner will often do this, however if you don’t have one, the artwork you wish to copy is larger than your scanner bed, or you are looking for the fastest way to copy lots of pages, using your camera with a copy stand may be the best solution. Although it is possible to hold your camera in front of the picture you wish to copy, the results can be improved through the use of a copy stand & proper lighting.
First the copy stand. Commercial versions are available, however for limited runs a tripod can be used to hold your camera. Attach your artwork to a bulletin board at the height of the camera lens & shoot away. To avoid keystone distortion, it is important that the camera be exactly perpendicular to the art work. The problem with using a tripod is the difficulty of changing the camera position as the size of each piece of artwork changes. Copy stands are designed so that the camera to work distance is easily adjusted. Since most of them mount the camera so that it shoots down at your artwork, gravity can be used to hold the work in position, easier & faster than pinning the work to a board. Because they are a limited use item, copy stands are fairly expensive for what they provide. Although a commercial stand usually includes lights, and is a complete package, you don’t need to purchase a copy stand. My favorite is one I made by modifying a photographic enlarger. Since many photographers have switched to digital & no longer need their enlargers, they are often an inexpensive garage sale item. I made an adapter with a right angle camera mount that replaces the enlarger lens board. The nice thing about using an enlarger rather than a true copy stand is the focus adjustment can be used for “fine tuning” the camera to work distance; faster & more easily adjusted than most real copy stands. The disadvantage is you will need to provide the lighting. One additional point – Unless your camera uses an electronic viewfinder or is a DSLR, don’t use the viewfinder to align the image. The optical viewfinder built into most point & shoot cameras looks out a different window than the camera lens. This is OK for distant shots, but close up it will be offset. The term is parallax.
The most important part of a copying system is lighting. If you have tried to take a photograph of a sign or other flat object, you probably found it is near impossible to get an image without a hot spot  if you used flash for the exposure. Even if you are not using flash, the light source often reflects back into the camera lens causing either flare or hot spots. The solution is to light the artwork from a 45° angle to the camera. Any reflections will bounce at the angle of incidence, or 45° away from the camera lens. You still will have a problem with any artwork that includes raised detail – shadows from the angled light source will show in the image. The solution? Use two light sources, each at 45°. To prevent shadowing, it is important that both light sources be exactly the same brightness, distance away, and at the same angle. It is also useful to use diffuse sources. The smaller a light source, the more harsh the shadows. This is why outdoor portraits taken under cloudy skies often look better than those under full sun. Depending on what you use for a light source, you may be able to use a piece of theatrical frost to soften or diffuse the source, or, aim the source away from the copy work & reflect it back with a white piece of matte board. In any case, the ideal light source is soft light striking the artwork from two sides at 45°.
The last steps are insuring proper exposure & white balance. My preferred method of measuring exposure is to use a incident light meter & set the camera manually. Since the stand is holding the camera, shake is unlikely to be a problem – I typically choose f: 5.6 since most lenses produce the least distortion in the middle of their range, and what ever shutter speed the metering suggests. If you don’t have a incident meter, you could use the camera’s metering system to measure the reflected light from an 18% gray card to determine exposure. If you don’t have either an incident meter or gray card, try setting the camera for aperture priority, set the lens to f: 5.6 & let the camera choose the exposure. If you are trying to match lighting levels between images, you might want to experiment to find the best exposure for the group of images (use your histogram to choose), then set the camera on manual, selecting the shutter speed & aperture that works best for the group. In most cases matrix metering will work better than spot or center weighted.
Setting white balance is a bit more difficult. You could leave your camera on automatic. In many cases this will work, however if the color of the art work is radically different between pieces, you may find the camera trying to correct a problem that doesn’t exist. One solution is to shoot RAW. The RAW format records the data from the camera sensor without assigning color temperature – you can adjust it using your computer’s photo software. Most photo software provides batch processing capabilities – set the correct balance for the first image then ise that setting to adjust all the rest. This works even better if the first image is a color chart.
If the RAW format isn’t available with your camera, it is important that the white balance be correct when the image is made because adjusting it in JPGs is difficult. You can get close by knowing what color temperature your light source provides. Most incandescent lighting is somewhere between 2800°K & 3200°K. Your camera probably has a incandescent setting – try it if you are using standard household bulbs for your source. If you are using fluorescent lighting your camera probably has a white balance setting for it however the color temperature of fluorescent sources can vary over a wide range, what’s more, there can be holes in the spectrum, graying or dulling some colors. In most cases, incandescent lighting is preferred. Some cameras let you fine tune your color temperature – here is a chart that shows the color temperature for many sources. Check your fine tuning or white balance selection by comparing the original color chart you shot in the first image with the image of it on your monitor. For this to be completely accurate you should have calibrated your monitor & printer, however getting it close on your monitor is better than no adjustment at all. If you find your prints don’t match your monitor and color accuracy is important to you, consider investing in a color calibration system.
For anyone following these posts, this is number 45. I am running out of topics of my own & would love some suggestions from others. If you have any please leave them as comments & I’ll see what I can do. Thanks!

