
Dear Gary,
I have an air conditioner on the roof. I had a problem with water leaking inside through the air conditioner when it rained so I sealed around the edges of the roof unit. I have since been told not to do that, that the condenser must drain onto the roof and now I will have that condensate coming inside. I removed the shroud but am unable to locate the hole or holes in the drain pan to see where it drains. Could you tell me where the holes are located so I can make sure they are clear and draining properly? The unit is so old that I am afraid to remove it to replace the 14-inch gasket. – Gus Tarver, (Merritt Island, FL)
Answer:
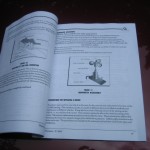
 Gus, indeed the only water seal on the roof air conditioner occurs at the perimeter of the 14-inch opening. The air conditioner sits atop the 14-inch gasket only. Condensation must drain through the pan and onto the roof of the RV outside of the 14-inch opening. The holes in the pan may be located under various internal components making them hard to see by simply taking off the shroud. You may be able to locate them by using a flashlight and a mirror, but they must be clear to allow the pan to drain.
The fact that you have rainwater leaking under the air conditioner mandates the unit be removed from the roof and a new gasket installed. It’s likely the constant weight and possible over tightening of the mounting bolts have compressed the gasket beyond usefulness.
Remove the interior shroud and the filters and you should be able to see the mounting bolts that can be removed. These bolts sandwich the roof between the bottom of the air conditioner and the interior plenum. Be sure to disconnect the AC power before removing the plenum.
Once the plenum is down inside the coach, the air conditioner can be carefully lifted off the 14-inch opening on the roof. Take care lifting the unit so that the roof material does not tear during the process. It’s best to use two people to remove the unit from the roof.
Once exposed, the 14-inch opening can be cleaned and a new gasket installed. Carefully inspect the roof for problem areas around the opening. Do not over-tighten the mounting bolts when reinstalling the A/C unit. You only want to compress the gasket enough to prevent leaks while securing the air conditioner.
(Please feel free to comment, however, please also note that due to the volume of communications I receive from multiple channels I cannot guarantee a personal response in every instance. However, questions of an overall general interest may be considered and published in an upcoming RV Doctor column.)

Randy Bengston
I forgot to mention, I have a 2007 Tourmaster that has the a/c problems
Randy Bengston
I have a 2007 and my #1 & 2 roof a/c’s have been leaking into the coach, when driving. when the coach is pugged into a/c power and not moving, it does not occur. Also, if the coach has been connected to a/c power at my house and either #1 or #2 a/c has been running (In the summer I set them on 86 degrees when not using the coach) h20 must be collecting in the celing somewhere , because when I use the coach and drive down the street and stop at the stop sign, the h2o flows down my interior windshield on the passanger side. I have not been able to get any logical answer for this occurance from the rv dealer. HELP!!!
Phil Schoner
My 2007 Monaco Dynasty (and former 98 Dynasty) drains condensate through tygon tubing to the ground under the coach, not to the roof. These lines could still become blocked, resulting in condensate overflowing the catch pan and dripping into the coach. I found that the best way to clean out these clogged lines was by blowing them out from inside the coach.
I accessed the lines from the filter doors in the ceiling of the coach. I pulled the tygon tubes from their connections and then blew out the lines backwards toward the roof A/C, or downstream towards the outlet drain beneath the coach usins good old mouth air pressure. I bought a short piece of tygon tubing to connect to the roof connection at the filter door so that I could get my mouth on it to blow back up toward the roof. I blew downstream toward the outlet beneath the coach using just the disconnected tubing at the filter access door in the ceiking.
After blowing back (Upstream) toward the A/C. I removed the cowel over the A/C and cleaned the catch pan of the clogged debris I had blown back. Otherwise, it would just re-enter the tubing and clog it again. I found that most of the clogs were between the catch pan and the access point in the ceiling inside the RV.
When blowing out these lines, it was very apparent when the clog had been cleared. The resistance to air passage was initially high, and when the line cleared, air flowed relatively easily.
Phil Schoner
John A. Holveck
This does not work on Newmar units. Instead of being clamped from inside like other brands they are screwed to the roof with lag bolts and must be removed from the roof as there is no access to them from inside the coach. At least that is how they were installed on my 99 Kountry Star and my 08 Cypress. The other RV’s that I have owned were installed the way that you describe.
Jim Peterson
==========
Like Gus, I’ve always been half-way intimidated by these rooftop AC units — no good way to look under there and SEE where the leak is; no good way to patch it either . . . just no easy way sometimes. Sealing around the perimeter just about guarantees a leak as the condensate then has no other place to go!
==========
But armed with your instructions, I would just dive in and go for it. One caution — especially if your RV is older like mine — lay down a couple half-sheets of 1/2″ plywood or OSB for the two workers to stand/kneel on while lifting the AC up off the gasket. This spreads their body weight over a larger area AND provides something safe to sit the AC on while prepping and replacing the gasket. And use extreme caution whenever using step-ladders for anything . . . them things will tip sideways in a heartbeat!
==========
sail4free
==========