


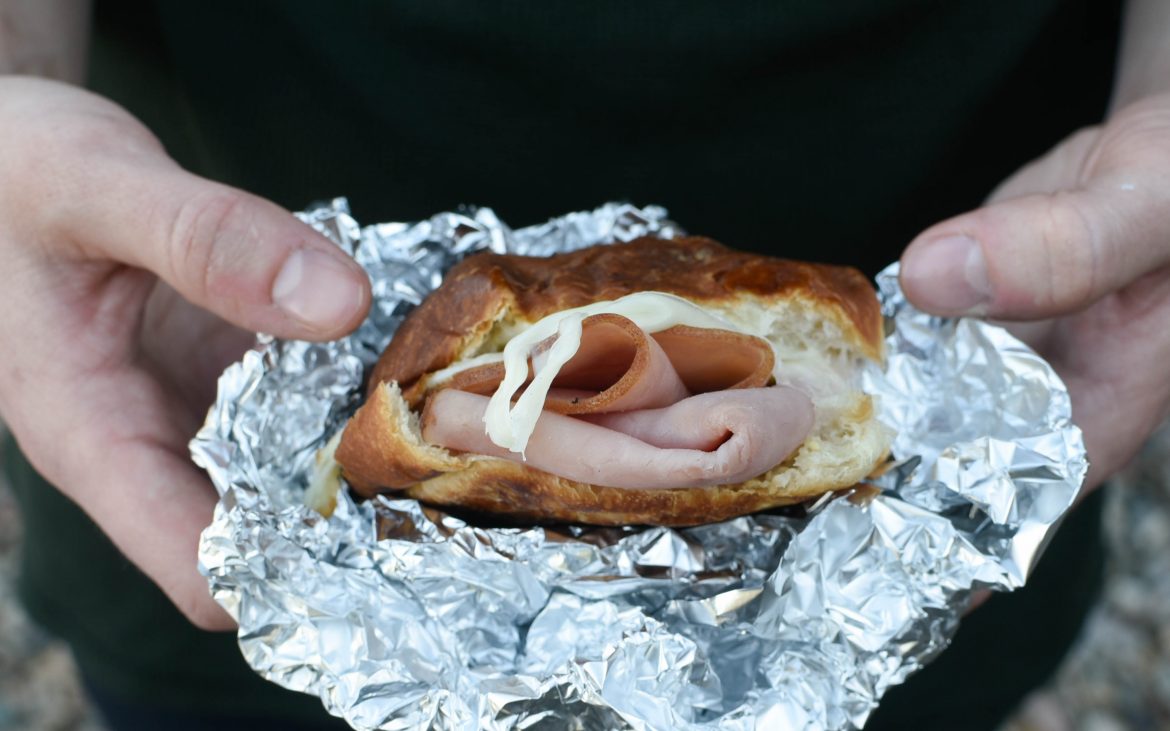
These foil-wrapped campfire sandwiches are a great choice for those weekend camping trips. They’re so easy to make and can be prepared with little mess at the campsite — or prepped ahead of time at home! They’re also a great way to get kids involved with dinner and have them build their perfect sandwich with endless customization options.
The concept is simple, which is what makes them so brilliant – assemble a bunch of sandwiches, wrap them in foil and warm them up in the coals of your campfire. Don’t have a campfire? They can also be made on the grill or in your RV’s oven.


Photo: Kacey Cribari
The sandwiches also hold up very well in the fridge and freezer, meaning you can make them at home before your trip and keep them in your RV fridge for a few days without them going bad. In fact, these sandwiches make great travel day food. In my opinion, they’re much better hot and toasty after a spell in the fire, but even cold they’re fantastic road snacks on those long drive days. And since they’re already wrapped in tinfoil, they won’t make a mess in the car and won’t get dishes dirty when you’ve stopped for a lunch break at a rest stop.
You can even freeze them for later if you’re going on a long road trip. Simply wrap the assembled sandwiches in foil and put them in an airtight resealable bag in the freezer. Then let them defrost before you’re ready to cook them. They should last up to 3 months in the freezer.


Photo: Kacey Cribari
Another thing that makes campfire sandwiches great are the customization options. Feeling fancy? Use croissants instead of buns. We like using Hawaiian rolls (especially with the pineapple BBQ recipe) but any type of roll will work, even hamburger buns. You can also swap out the meat and cheese to fit your taste. Don’t like ham? Try sliced turkey and swiss cheese, or roast beef and provolone. You can also swap out mustard for mayo or use butter if you’re not a fan of either. The easily changed ingredients are what makes these so fun to make, and why they’re great for the times when you don’t want to spend a ton of energy coming up with what to eat for lunch or dinner.
We’ve included two easy campfire ham and cheese sandwich recipes below. One is your basic ham and cheese sandwich, and the other recipe spices things up a bit by adding pineapple rings and BBQ sauce. These sandwiches are a great start to dinner, and if you want to add a side dish, you can make a whole campfire meal with our recipe for parmesan zucchini foil packs.
Campfire Ham and Cheese Sandwiches
Makes 12 sandwiches
Equipment:
Heavy-duty foil
Ingredients for Hawaiian BBQ Ham Sandwiches:


Photo: Ponce Photography
• 1 lb deli-sliced ham
• 12 Hawaiian rolls or regular rolls
• 12 slices of cheese such as swiss or provolone• Butter
• BBQ Sauce
• 6 pineapple rings (use drained, canned pineapple to make things easy) – cut in half
Prep Directions:
1. Slice the rolls in half.


Photo: Kacey Cribari
2. Spread both sides of the roll with butter.


Photo: Kacey Cribari
3. Layer slices of ham onto the bottom half of the roll.


Photo: Kacey Cribari
4. Add a slice of cheese on top of the ham. Tear up the slices of cheese to fit if they’re too large for the roll.


Photo: Kacey Cribari
5. Add half of a pineapple ring to each sandwich and a good-sized dollop of BBQ sauce.


Photo: Kacey Cribari
6. Add the top half of the roll/bun.


Photo: Kacey Cribari
7. Wrap each sandwich tightly in a layer of foil.
Cooking Directions for Both Versions
If you’re cooking these immediately, place the wrapped sandwiches in the hot coals of a fire. Cook 5-10 minutes, turning frequently with tongs until the cheese is melted and the sandwiches are heated through. Start with 2 minutes a side and check to see if the cheese is melting. If they need more time, put them back on the coals for an additional minute or two. These will heat up fast since everything is already cooked and you’re just warming the sandwiches up. Keep an eye on them, if you leave them in the coals too long, they’ll burn!

Photo: Kacey Cribari
Carefully unwrap the foil (it will be hot and watch out for steam) and enjoy. You can even eat them right out of the tinfoil, leaving you with next to no cleanup.
Don’t have a fire at your campsite? Not a problem. You can also cook these in an RV oven (or in your home oven if you want to do some backyard camping). Bake the foil-wrapped sandwiches directly on the oven rack at 350 degrees F for 10-15 minutes, until the cheese is melted.
If you’re prepping these ahead of time, place all the foil-wrapped sandwiches in a large resealable bag to take with you in the fridge or in a cooler for up to 2 days. Once you get to your campsite you can cook them over the fire, grill, or in the oven.
You can store leftover sandwiches in the fridge for up to 2 days, or in the freezer for up to 3 months. As mentioned above, leftover sandwiches make great travel day snacks, so don’t be afraid to make extras!