


What better way to celebrate summertime than an RV barbecue? We’ve put together five recipes — from sweet to savory — that are snazzy enough for the Ritz, yet casual and easy enough for the RV. Dazzle your hungry guests on your next outing with these delicious summer RV grill recipes.
These recipes highlight how you only need one trick, or special ingredient, to take a dish from good to out-of-this-world great. Your guests will think you spent hours working on something that really only took you minutes to make. Be sure to hit the nearest farmers market to get the freshest ingredients for your cookout.


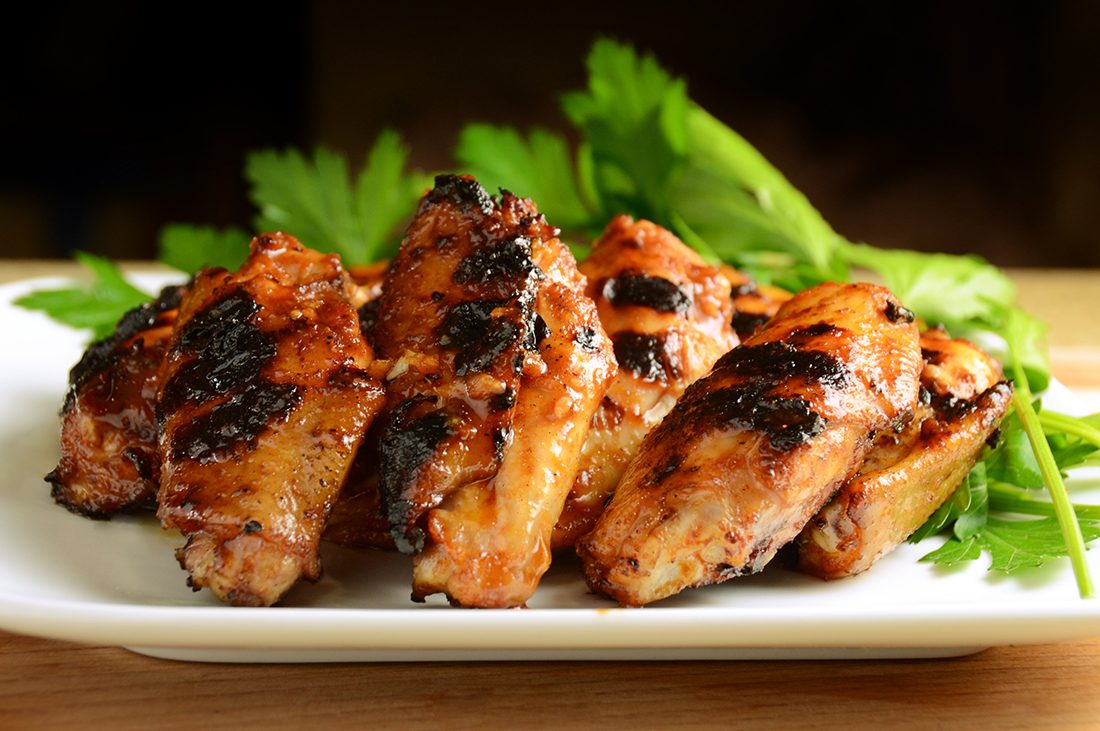
1) Sriracha Honey Chicken Wings
Grilled chicken wings are a classic starter. The secret to good wings is the marinade, and this one combines spicy Sriracha sauce with just the right amount of sweetness to create a finger-licking-good flavor. Whenever we’ve served these, our wings have received compliments all-around with requests to share the “secret” recipe, so now we’re passing it along to you.
Serves 6-8 as an appetizer. Total cooking time: 5 minutes prep, 1 hour marinade, 18-20 minutes grilling
Ingredients:
2 pounds of chicken wings, skin on
1/2 cup Sriracha sauce
4 tablespoons soy sauce
4 tablespoons honey
2 tablespoons rice vinegar
2 tablespoons olive oil
4 teaspoons toasted sesame oil
4 cloves garlic, crushed


Directions:
To make the special marinade, combine the last seven ingredients (Sriracha sauce, soy sauce, honey, rice vinegar, olive oil, toasted sesame oil and garlic) in a bowl and whisk to mix. Set aside half of the marinade to use for basting.
Place the chicken wings in a large 1-gallon resealable plastic bag. Pour the remaining marinade over the chicken wings, press any air out of the bag and close it up. Then massage the wings around to thoroughly coat them (note, you can also just pour the marinade over the wings in a dish, but I find that using the plastic bag is a snazzy trick that gets much better marinating results). Put the closed bag into the fridge and let it sit for 1 hour.
Remove the chicken wings from the bag and discard the marinade.


Preheat the grill and brush it with oil. Once the grill is hot, turn the temperature down to medium and place the wings meat-side down on the grill. Cook for 18-20 minutes, turning the wings over every 3-5 minutes to get even cooking on both sides. Every time you turn the wings, brush them with the reserved marinade for extra tastiness.
Once cooked, remove the chicken wings and get busy eating! The wings are absolutely delicious, but you can also serve them with ranch or blue-cheese dressing dip if you like.


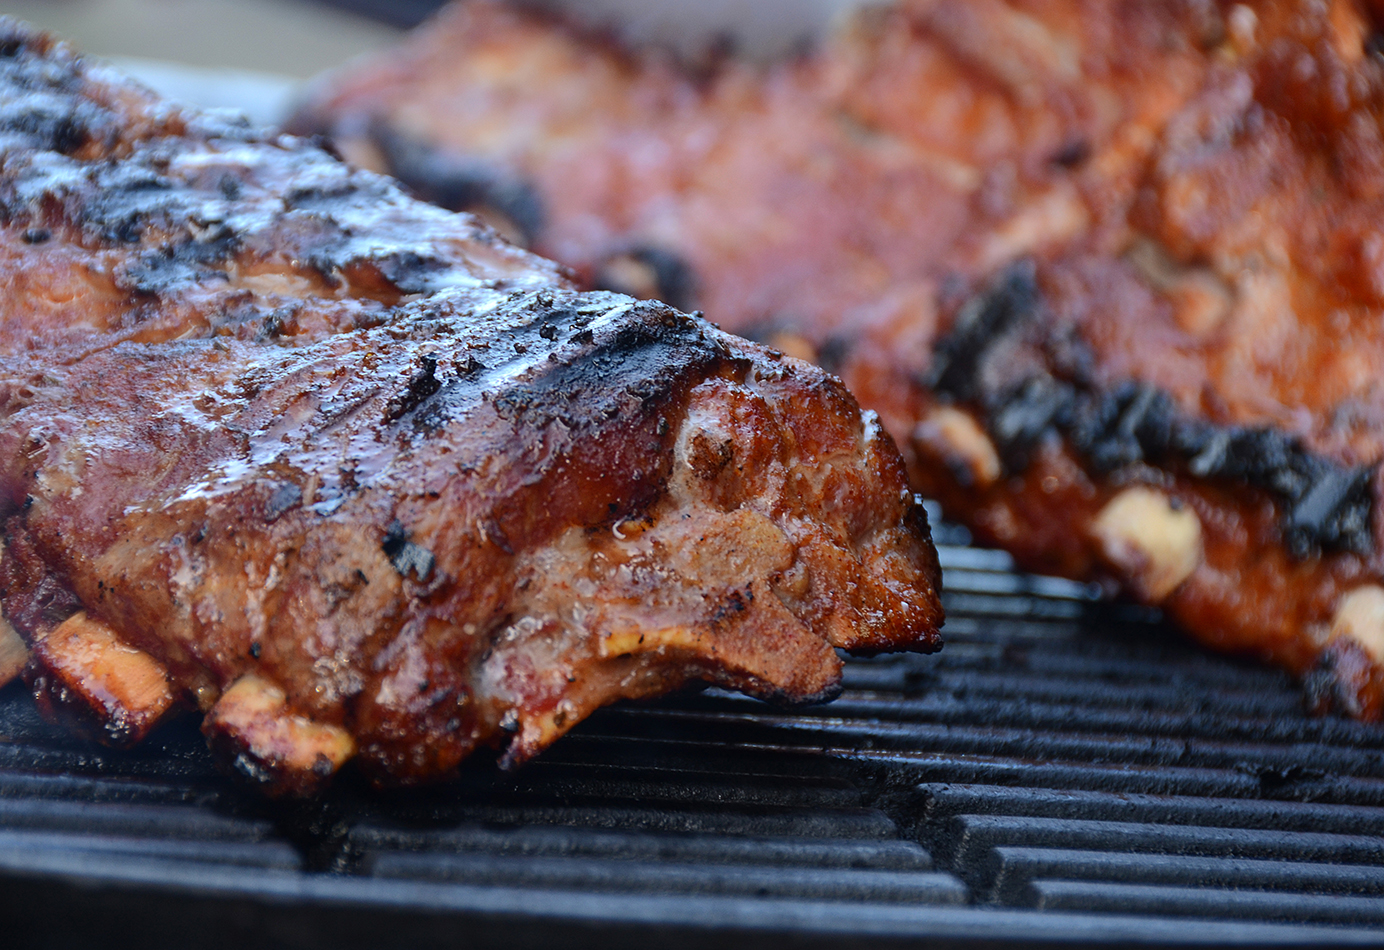
2) Dry-Rubbed Gourmet Moist Grilled Ribs
My hubby loves ribs, and when he’s got the time, he will smoke ribs, tending and watching them carefully, for more than six hours to create the perfect meat. We’ve always wanted a quick grill-based recipe that we could whip up anytime. The big problem is that pork prefers slow cooking and tends to dry out really fast.
The secret solution is easier than you think. Last year, hubby had the brilliant idea to use a smoking trick called the “Texas Crutch,” which basically involves braising the meat in moisture on the grill for 30 minutes. By combining this with a good dry-rub, we’ve created a rib recipe that is both tasty and fall-off-the-bone tender moist.


Serves 4. Total cooking time: 5 minutes prep, 1 hour marinade, 40 minutes grilling
Ingredients for dry rub:
You can use a store-brought dry rub if you like, but if you want something amazing, this is one of the best pork dry rubs we’ve ever tasted. The sugar creates an incredible crispy crust and the spice adds the perfect taste counterpoint.
1/2 cup white sugar
1/2 cup brown sugar
1/2 cup paprika
1/4 cup onion powder
2 tablespoons powdered ginger
2 tablespoons dried oregano
2 tablespoons cayenne (add more if you want extra spice)
2 tablespoons black pepper
Mix all ingredients together and your dry rub is ready.


Ingredients for ribs:
1 rack of pork ribs (any kind)
2 tablespoons prepared mustard
1 cup dry rub
1 cup water, chicken stock or apple juice (for the braise)
Directions:
Rub 1 tablespoon of the mustard onto the front side of the ribs until completely covered (the mustard adds taste and serves as a “glue” for the dry rub). Sprinkle a good amount of dry rub over the mustard and pat it down. Turn the ribs over and do the same thing with the mustard and dry rub on the backside. Cover the ribs with plastic wrap and let them sit with the rub for 1 hour.
Preheat the grill. When hot, place the ribs meat-side down on the grill for 5 minutes until they are browned and have nice grill marks. Turn the ribs over and do the same thing on the other side. This initial step creates a yummy “crust” on the ribs without burning them.
Prepare a large foil packet using heavy-duty aluminum foil. Place the ribs inside the foil, meat-side up and pour 1 cup of braise liquid (water, chicken stock or apple juice) into the bottom. Close the packet tightly by crimping together the top (make sure there’s nothing leaking out) and place the entire packet back on the grill. Turn the grill down to medium, close the lid and let the ribs cook for an additional 30 minutes. This is the “crutch” trick that will braise the meat slowly and keep it moist.

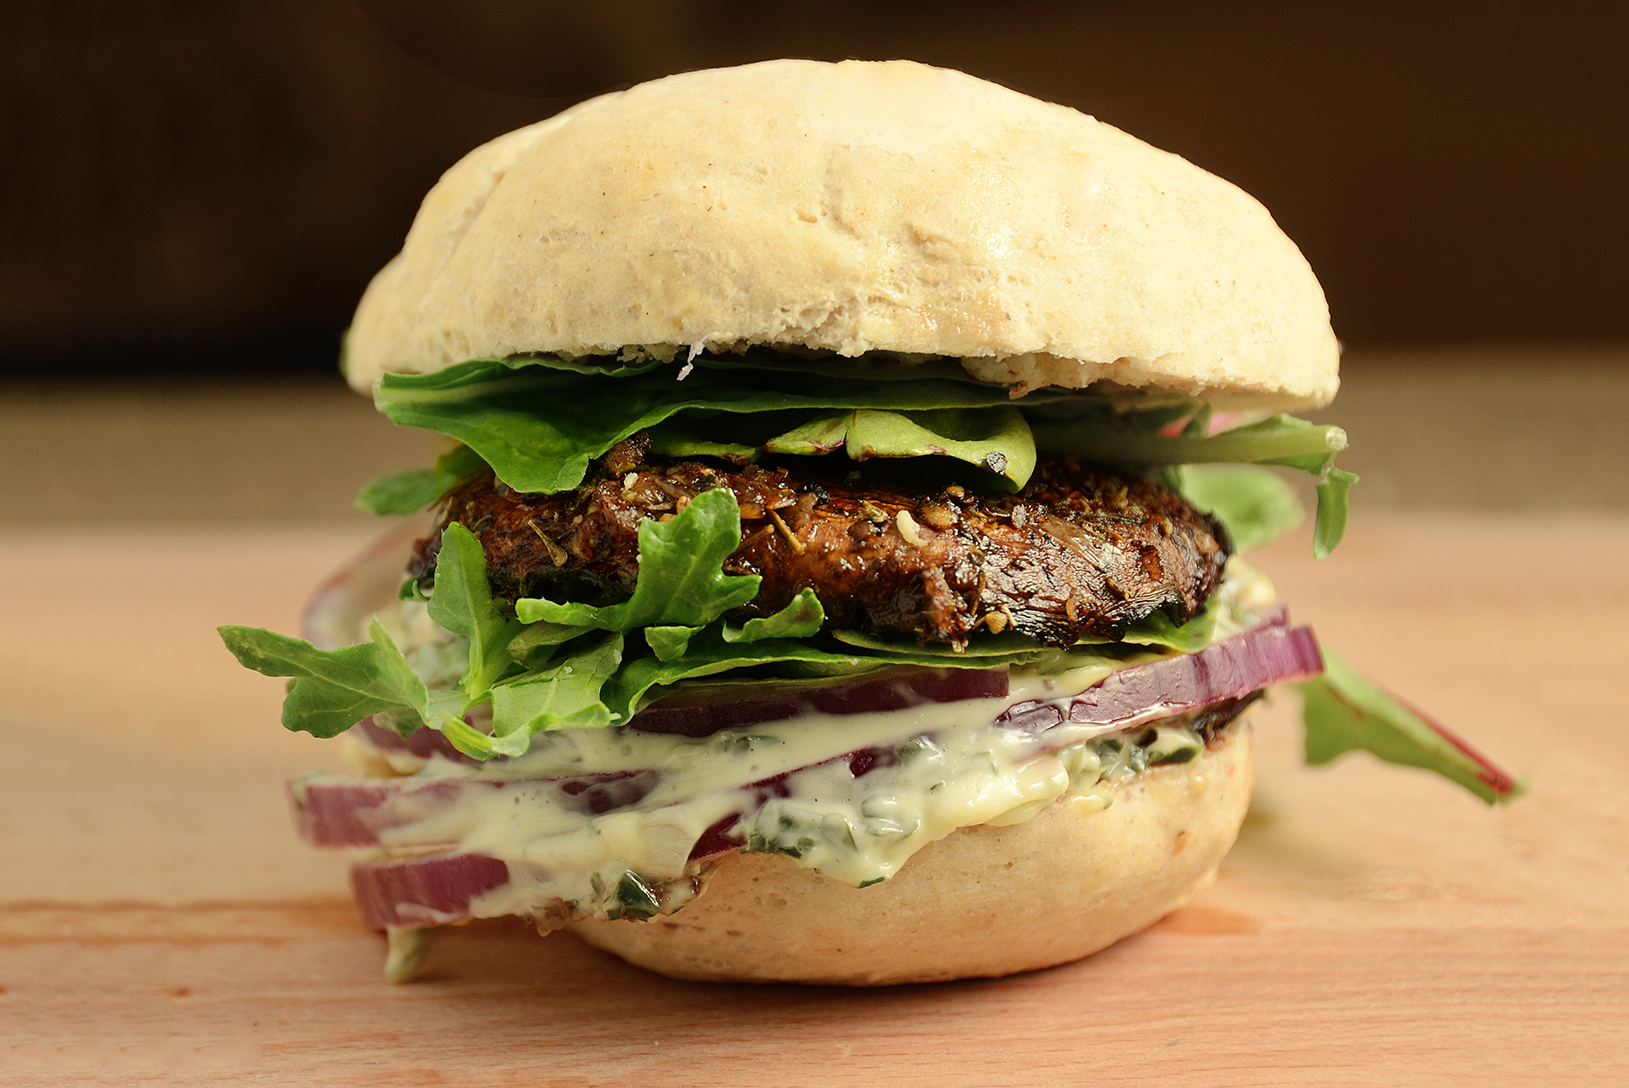

3) Grilled Portobello Mushroom Burger with Basil-Garlic Aioli
Looking for something special to serve your vegetarian friends? Portobello mushrooms are the perfect answer. Meaty yet tender, they can be grilled in just 8 minutes and require no special prep except for a quick 15-minute marinade. Add in a tasty topping and you’ll create a veggie burger that even your meat-loving friends will drool over.
Our “secret sauce” here is a basil-garlic aioli. When basil is in season, it’s one of our all-time favorites and it’s so good that we end up using it on just about everything. Not only is basil-garlic aioli a topping for portobello mushrooms, it’s an excellent dip for veggies and a super-tasty topping for meat burgers (it pairs particularly well with chicken and lamb). This sauce is what “makes” this recipe and my advice is to make extra ’cause you’re going to want it.
Serves 4. Total cooking time: 5 minutes prep, 15 minutes marinade, 8 minutes grilling
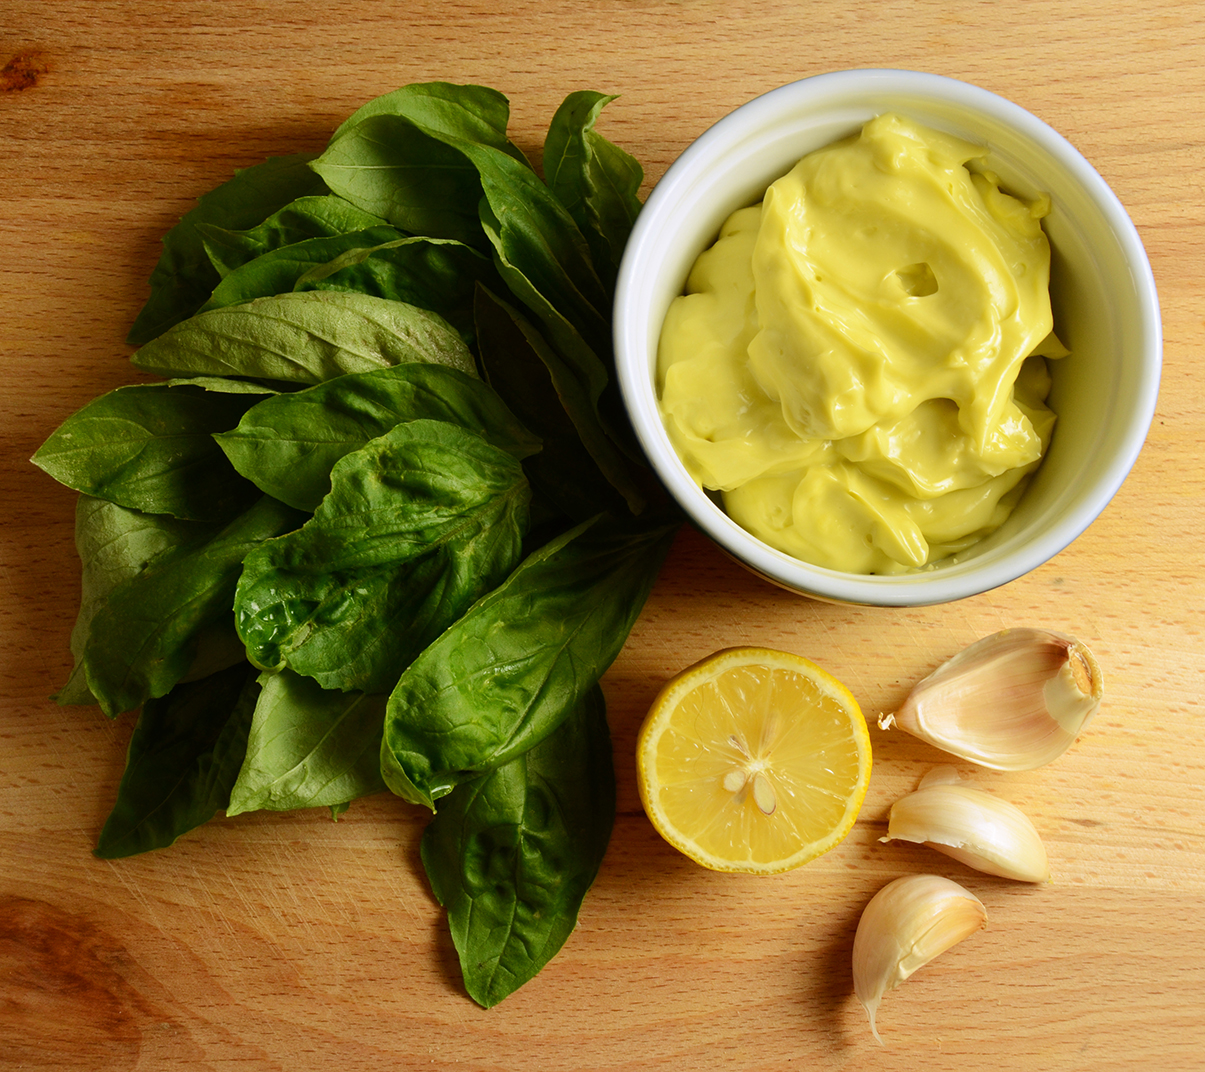

1 cup mayonnaise
24 basil leaves, thinly sliced
3 large cloves of garlic, chopped or crushed
Juice of 1 lemon
salt to taste
Directions:
Cut basil into thin strips and either finely chop the garlic or crush it with a garlic press. Whisk all the ingredients together, cover with plastic wrap and put the aioli mixture into the refrigerator for at least 1 hour to allow flavors to develop.

4 large portobello mushrooms
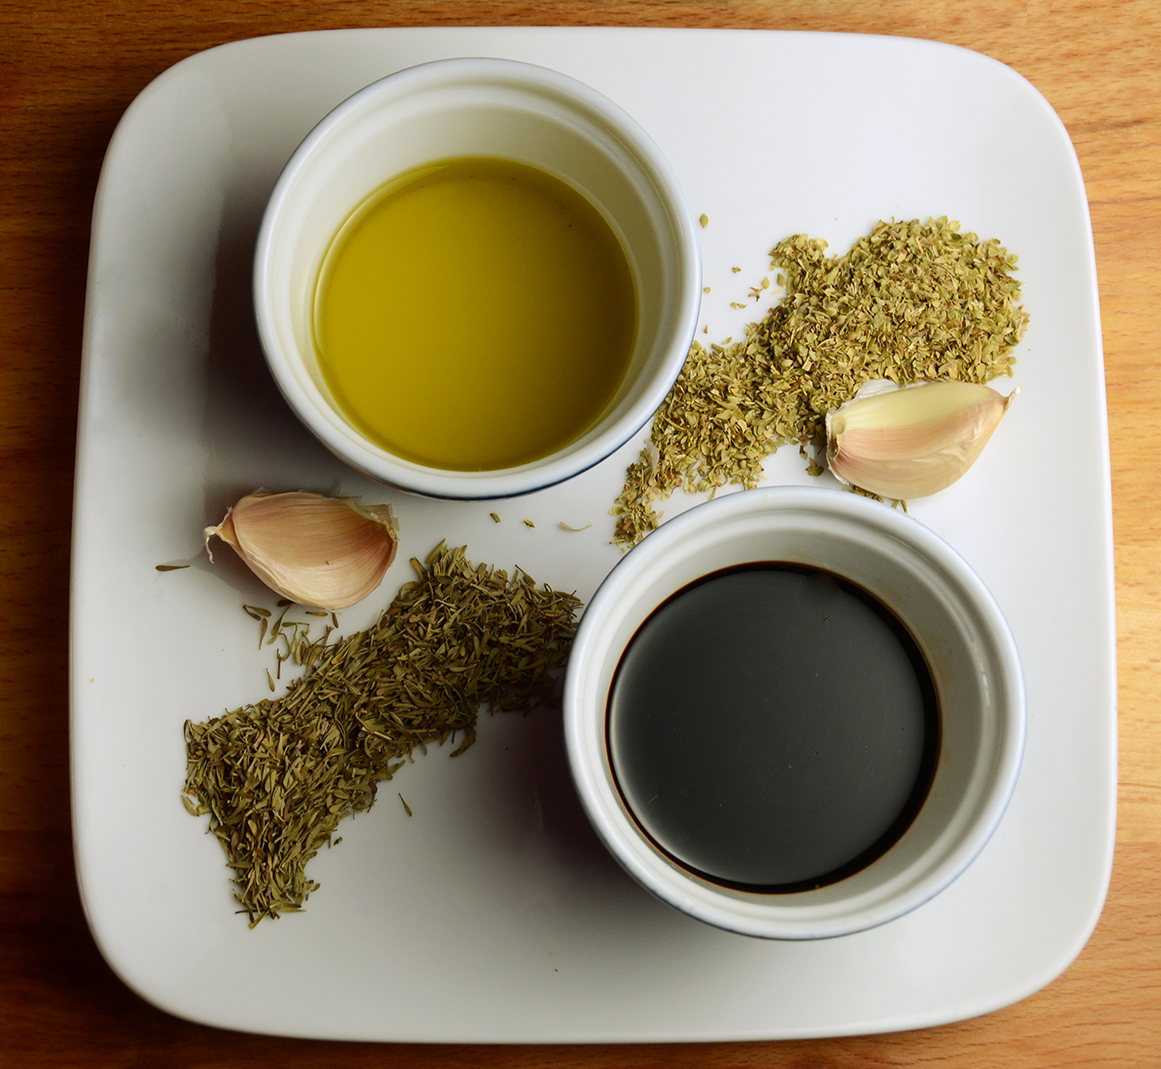
1/4 cup balsamic vinegar
1/4 cup olive oil
2 cloves of garlic, crushed
1 teaspoon dried thyme
1 teaspoon dried oregano
salt and pepper
Directions:
Whisk together the balsamic vinegar, olive oil, garlic, thyme, oregano, and salt and pepper to create the marinade.
Place the portobello mushrooms in a 1-gallon resealable plastic bag and pour the marinade into the bag. Close the bag and carefully massage/distribute the marinade around the mushrooms. Leave to marinate for at least 15 minutes.
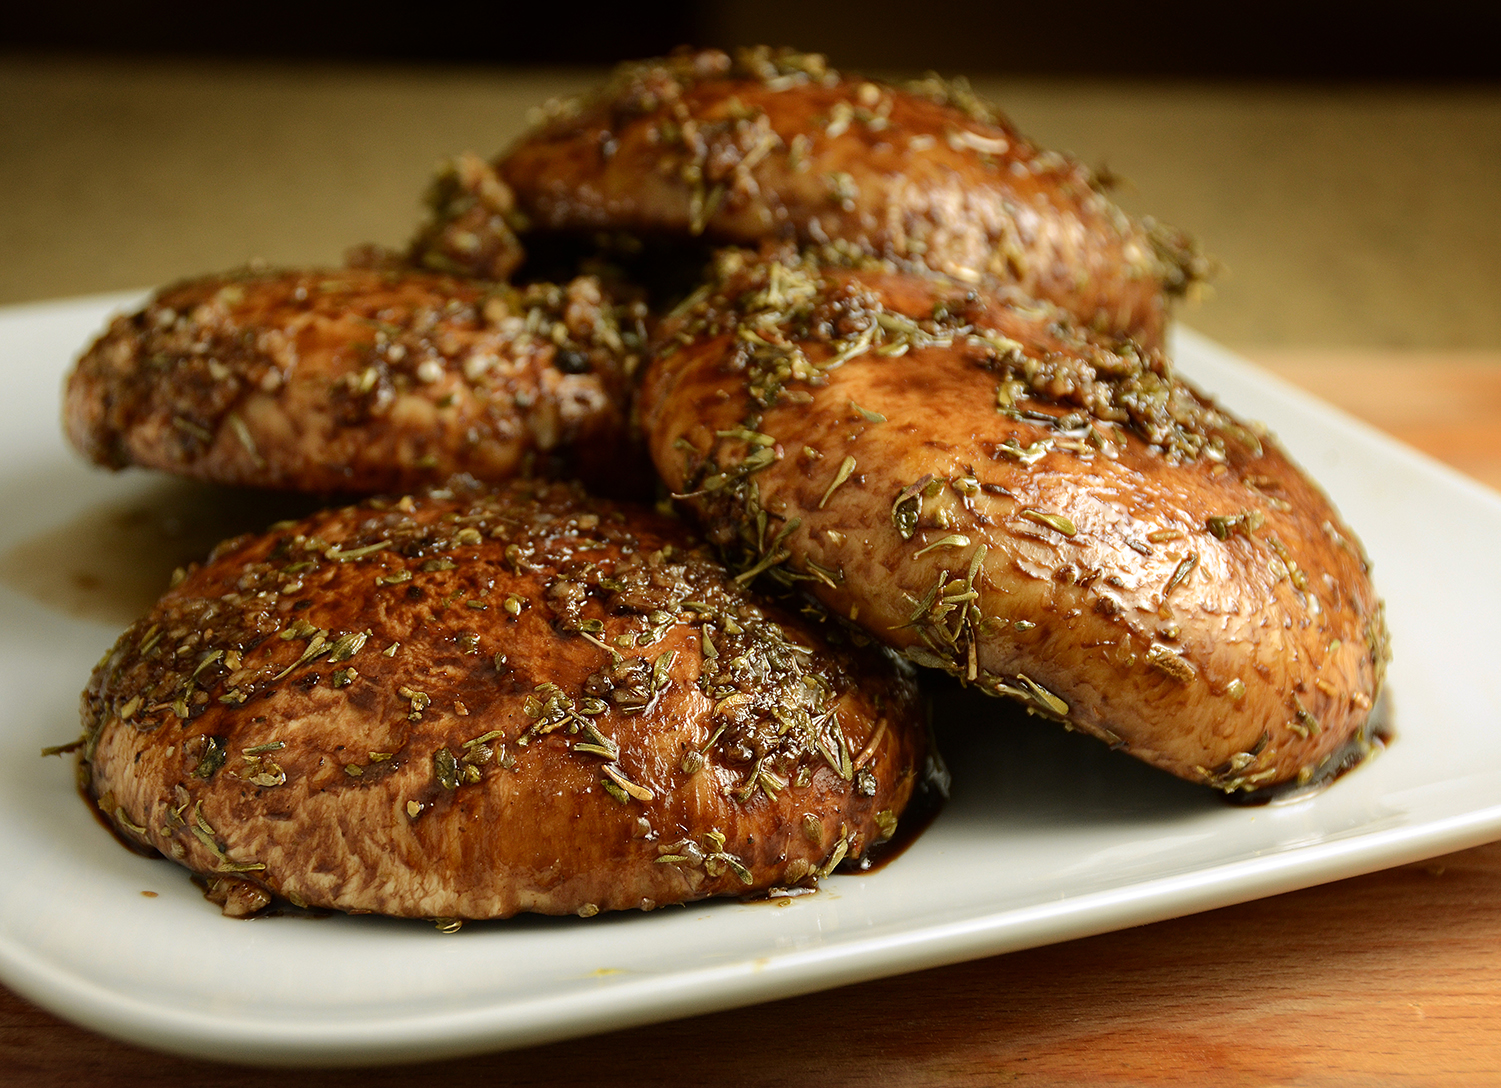

Preheat the grill. When hot, place the mushrooms cap-side down on the grill. Grill for 4 minutes. Turn the mushrooms over and grill another 4 minutes on the other side. You can use the last few minutes to grill/heat your burger buns too.
Slather the burger buns with the aioli and layer the grilled mushrooms with whatever extra toppings you like. I find red onions, tomatoes and salad greens (especially salad greens with a little bite like spinach or arugula) go well, but any topping with do. Enjoy.
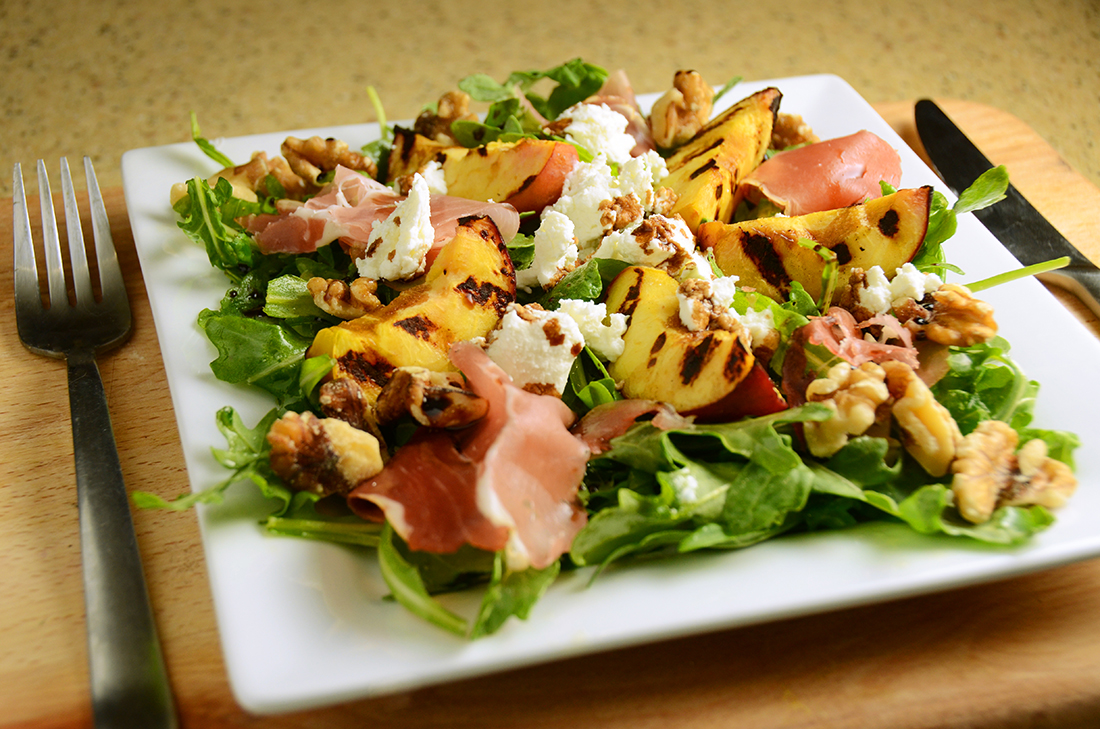

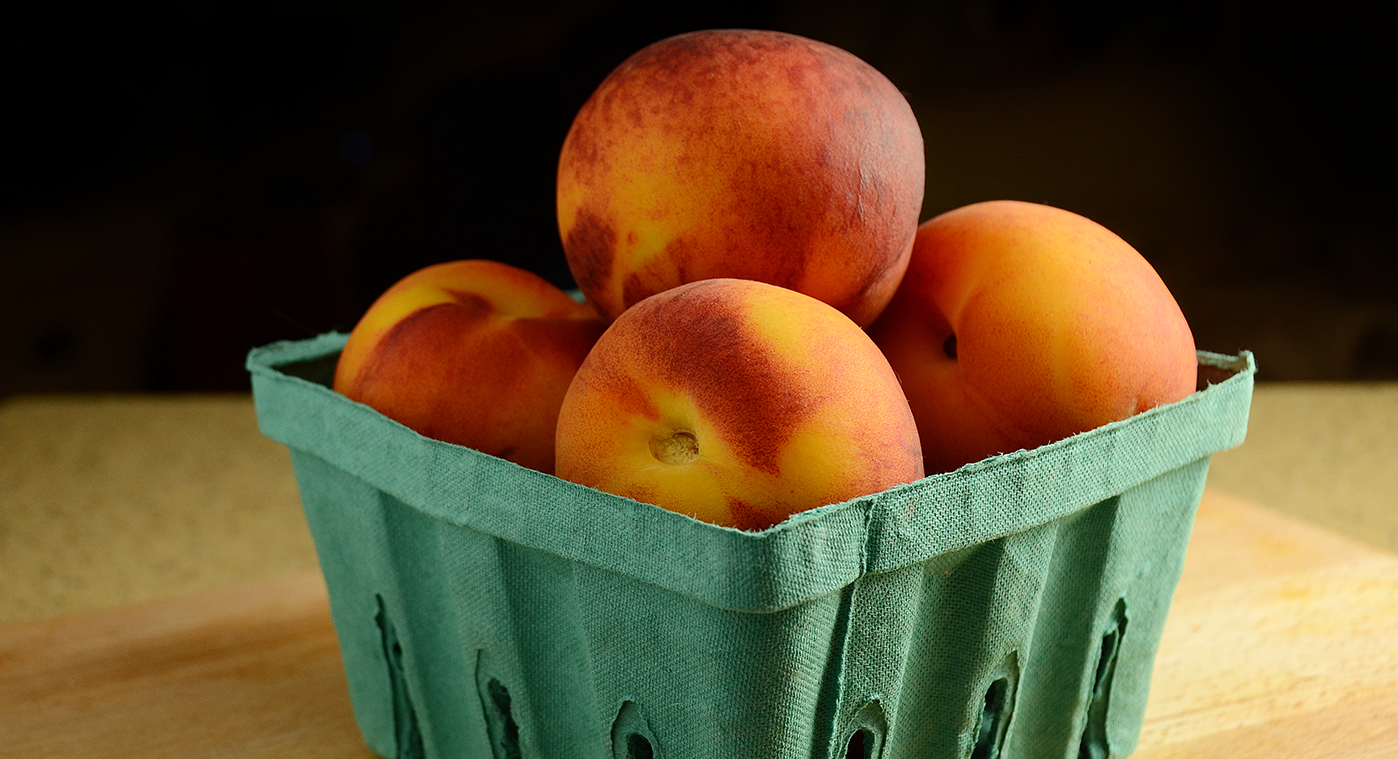
4) Grilled Peach Salad with Balsamic Honey Drizzle
Peaches are one of our favorite fruits, and when they are in season, peaches are oh-so-amazingly good. This recipe takes only 5 minutes to make and is so easy it’s almost silly, but the salad is so tasty you’ll think it came from a five-star restaurant.
The secret is quickly grilling the peaches to bring out their sugar and pairing that fruit with spicy arugula, salty goat cheese and a sweet balsamic drizzle. The resulting combo is amazing. Serve this summer delight with your favorite grilled meat, or just have it as a refreshing afternoon meal.
Serves 4. Total cooking time: 5 minutes prep, 4 minutes grilling
Ingredients for balsamic honey drizzle:
1/3 cup balsamic vinegar
2 tablespoons honey

Directions:
Bring the balsamic vinegar to a boil over medium heat in a small pan and let it boil/reduce for about 2 minutes. This step intensifies the flavor of the balsamic. Take the pan off the heat and stir in 2 tablespoons of honey. Leave to cool.
Ingredients for peach salad:
4 ripe peaches
1 7-ounce bag of arugula salad
6 slices prosciutto ham (can omit for vegetarians)
1/4 cup crumbled goat cheese
2 tablespoons walnuts, chopped
Olive oil (to dress)

Directions:
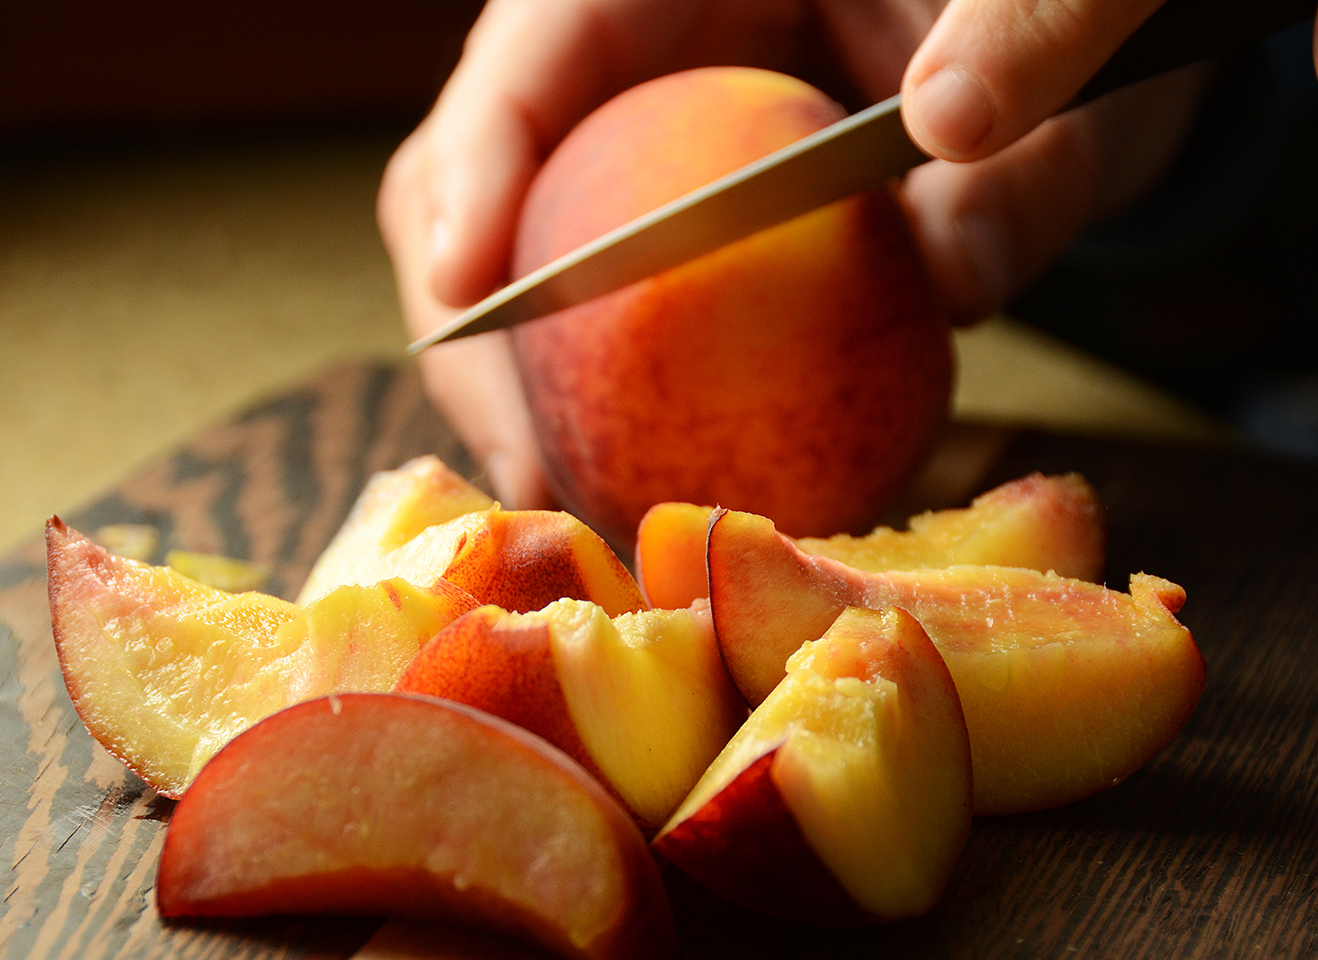
Cut the peaches into six wedges each (cut in half, remove the stone and then cut each half into three wedges).
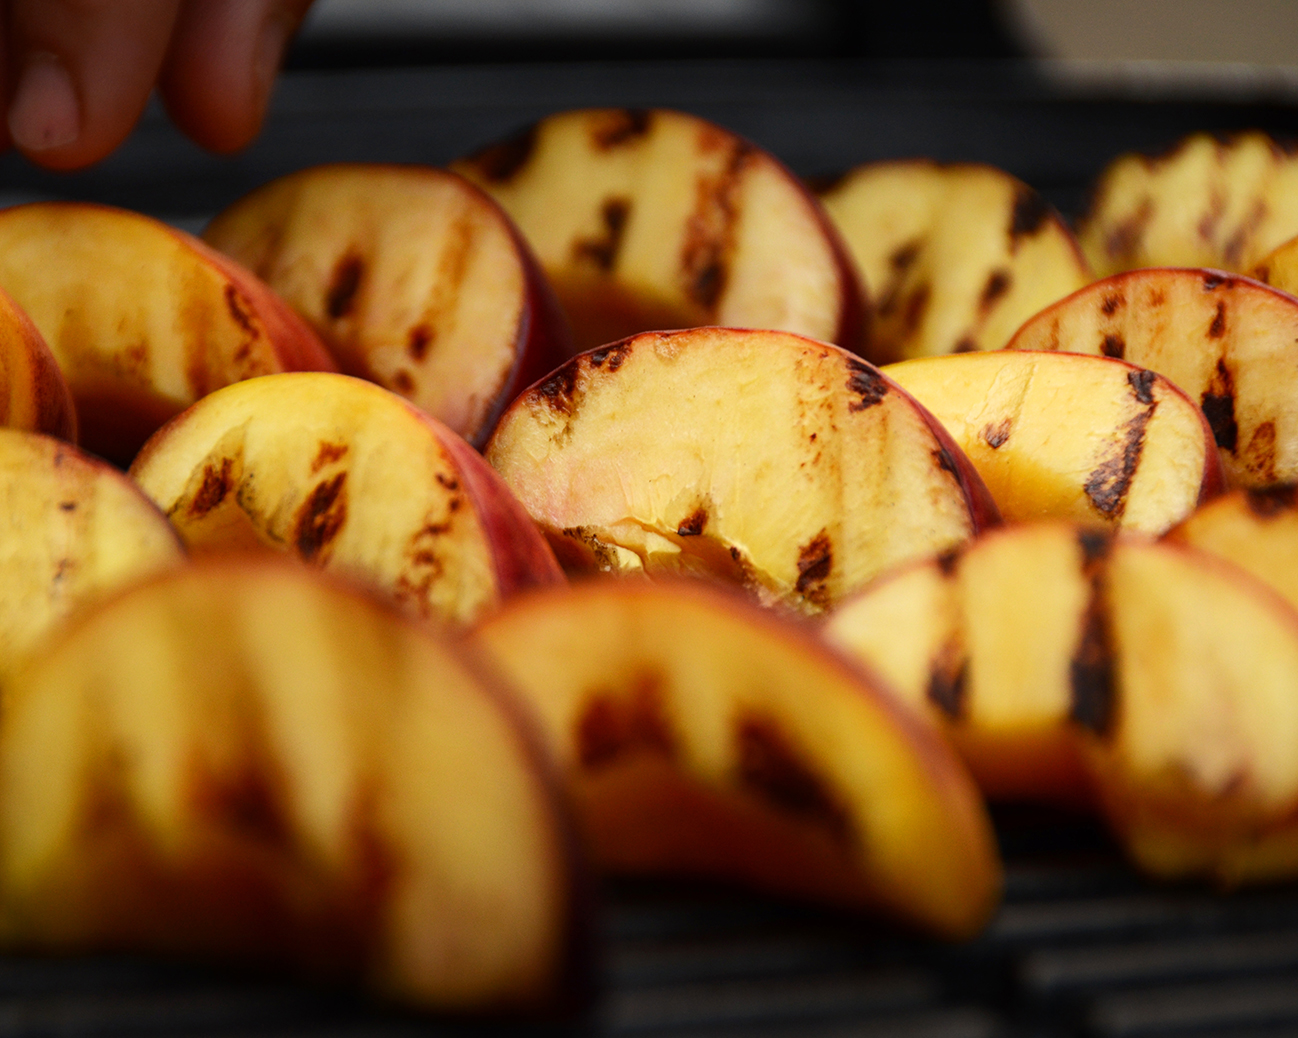
Heat up the grill and brush the rack with oil. Place peach wedges face down on the grill for 1 minute until they get nice grill marks on the first side. Turn them over and grill for another 1 minute on the other wedge face. If peaches are very ripe/soft you may only need to grill 30 seconds on each side. Take the peaches off the grill.

Place arugula salad in a large salad bowl. Drizzle 2 tablespoons of olive oil onto the salad and toss until well mixed.
Distribute salad into four plates or bowls. Arrange prosciutto ham, grilled peaches, goat cheese and walnuts on top of the salad. Drizzle everything with the balsamic honey drizzle. Eat and enjoy!

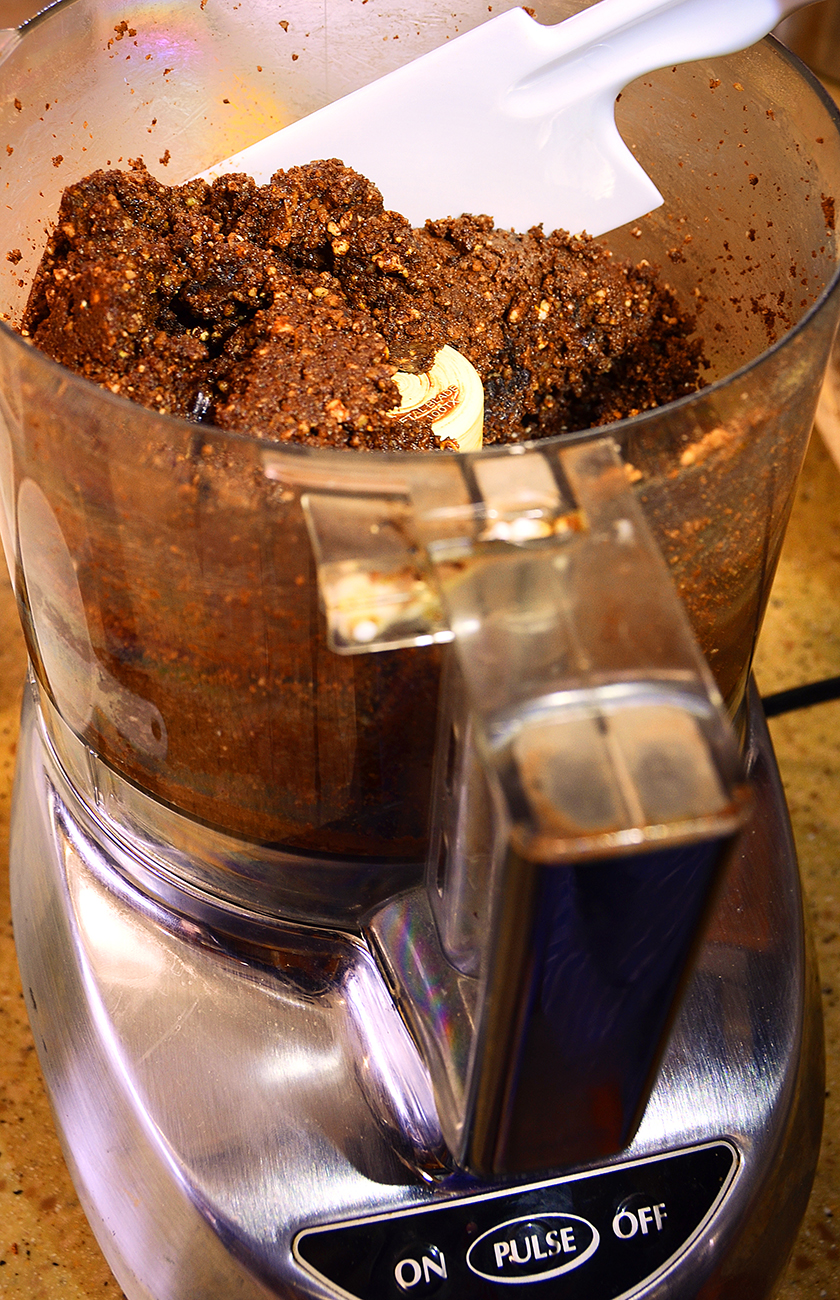
5) Decadent Chocolate-Nut Balls
I’m a confirmed choc-a-holic, but I’ve always struggled with chocolate dessert recipes, most of which are rather delicate and/or take too much time to make. For years I searched for the perfect 15-minute chocolate recipe, and when I found this one (thanks to an RV buddy), I was immediately hooked.
These balls literally only take minutes to make, they require no special equipment other than a food processor and taste as decadent as handmade Belgian truffles. The ingredients are simple and healthy, and as a bonus, they are vegan, dairy-free, soy-free and gluten-free, so they satisfy just about every dietary limitation out there (except for nut allergies).
The basic recipe includes nuts and dates. You can use just about any kind of nut you have in stock, and for those of you who like a little something “extra,” you can add some rum or whisky to the recipe. Other optional extras include coconut, lime, chili, peanut butter and banana.
Makes 30 balls. Total cooking time: 15 minutes (mixing and ball-rolling)
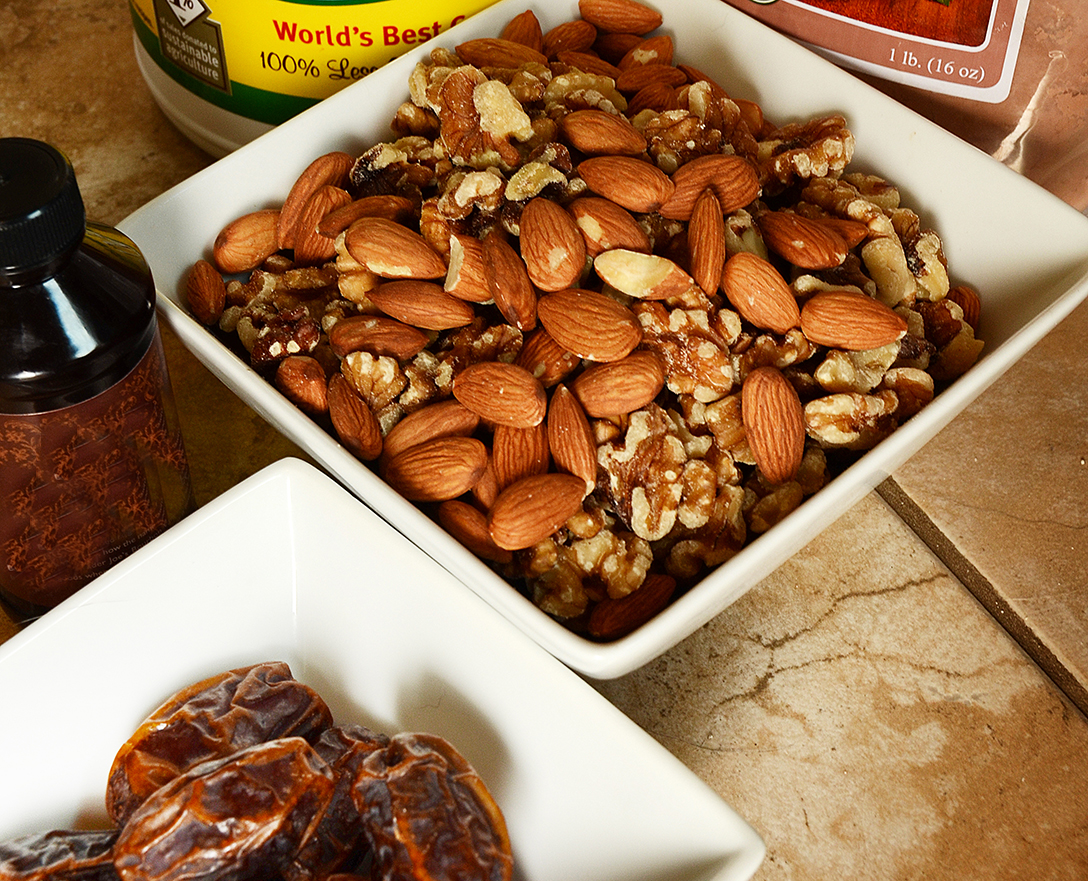


3-4 cups of nuts (almonds, walnuts, cashews or a mix of nuts)
10-12 Medjool dates, pitted
1-2 tablespoons coconut oil
4 heaping tablespoons cocoa powder
1 tablespoon vanilla extract
1-2 tablespoons rum or whiskey, optional
shredded coconut, optional
Instructions:
Add nuts to the food processor and pulse until finely chopped. Add remainder of ingredients and mix. Depending on how dry the ingredients are, you may need to add 1/4 cup or more of water to get the mix to come together. Use a spatula to spread out the mix and repulse/remix it a few times, so that all the ingredients are well dispersed. The mix is ready when it “clumps” together in a big, sticky ball inside the food processor.
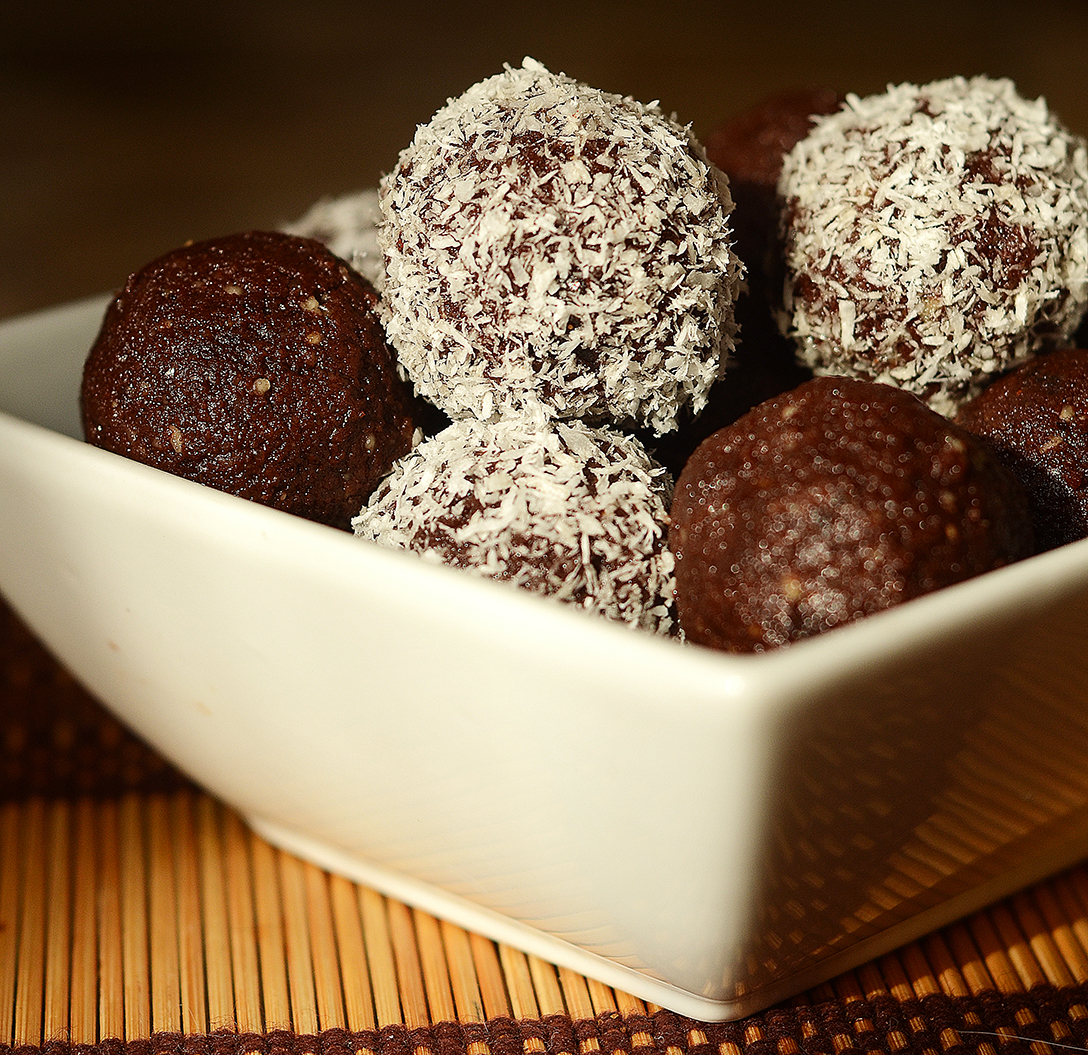
Roll the mix into bite-size balls. If you like coconut you can also roll the balls in shredded coconut to cover. Then refrigerate for at least an hour. Serve and enjoy.
All photos by Nina Fussing, Wheelingit.us.