


Emptying the “dreaded tanks” is something all adults traveling in a Recreational Vehicle should know how to complete. While my husband is happy to take on that responsibility, I felt I should know the process in the event he is not available to do the job if it becomes necessary.
So how do I know when it is time to do this task? There is a control panel inside of our RV that indicates the status of the tanks. Usually, freshwater, grey water and black water capacity levels can be determined at the push of a button with an indicator light reading “E” (Empty), 1/4 full, 1/2 full, 3/4 full or “F” (Full). As you approach Full, it is time to perform what is commonly called “the dump.”

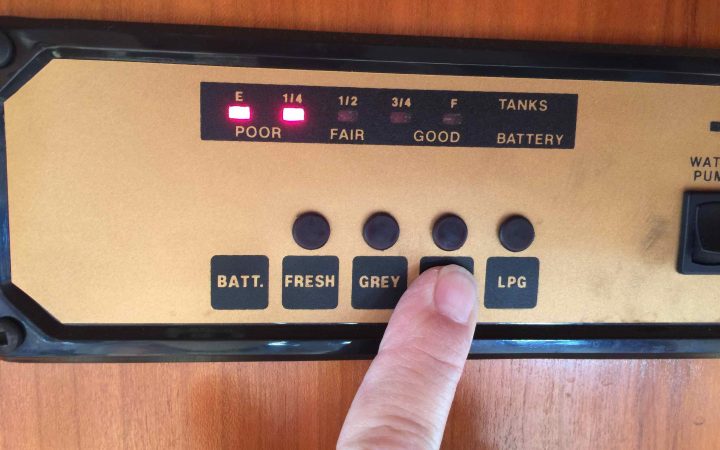
Our control panel for viewing tank fill levels.
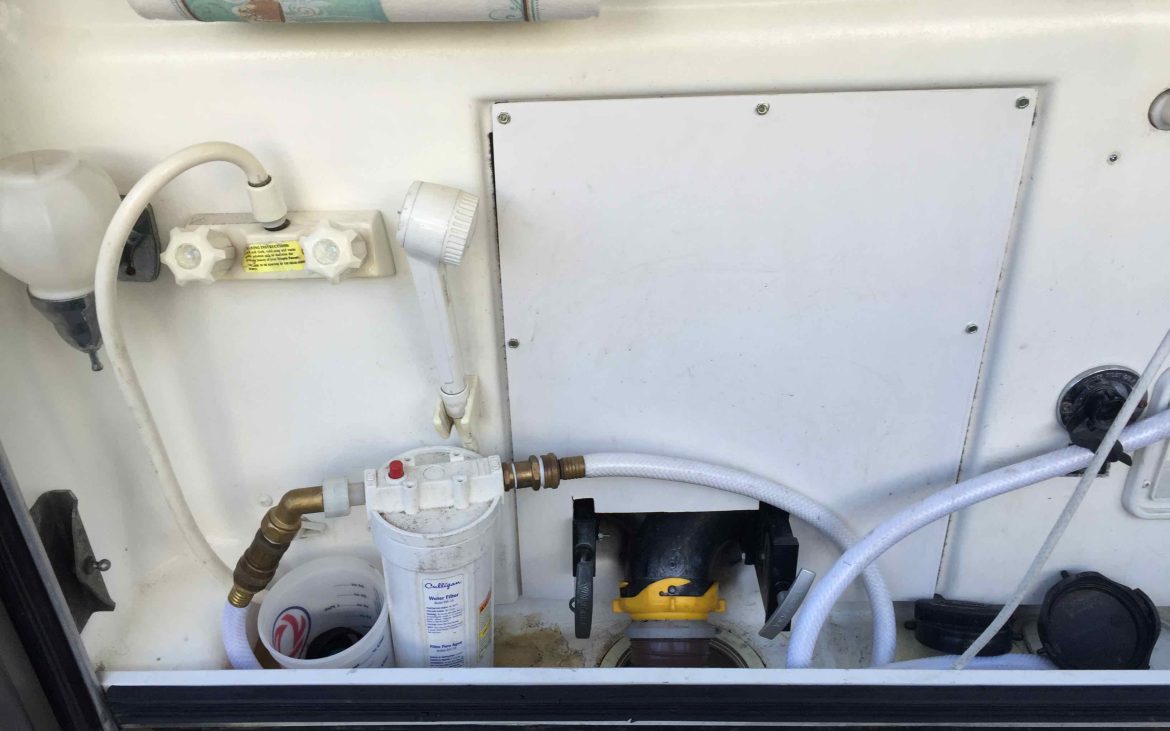
Most travelers hook up when they arrive at a park, so your “equipment for dumping” may already be in place. But here’s what you need if it is not: Disposable Gloves, Sewer Drainage Hose with Connection Fittings, a Sewer Adaptor Elbow Fitting and a Water Hose (reserved only for this function). The bay location for this doing this process, with the necessary hookup connection for the holding tanks, is normally located on driver’s side of RV. We keep the items listed above in a bay next to this compartment.
The bay holding the drain for your RV tanks will usually have the following features:
- A sewer tank connection outlet with a cover cap
- A fresh water hose connection – sometimes with a water filtration cartridge hooked up
- A hot and cold water faucet with a hose for rinsing your hands
- A “Sewer Flusher Hose Valve”
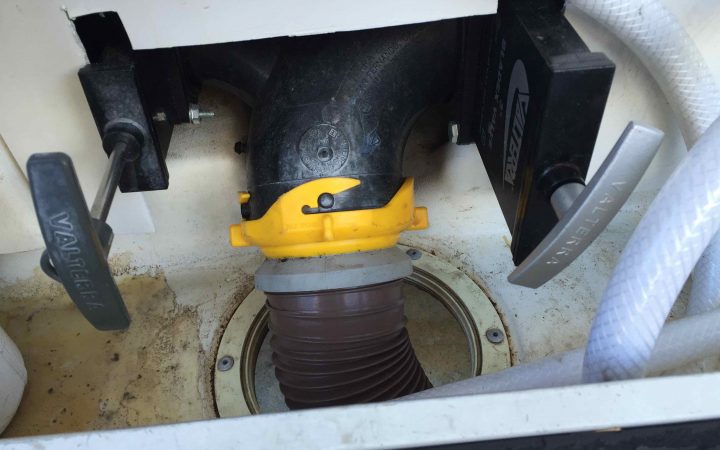
Sewer Hose Connection with Blade Valves
This is how we dump our tank:
- Put on a pair of disposable gloves.
- Hookup a water hose from the park’s water spigot to the sewer flusher valve (sometimes your site will have two spigots at each site so you don’t have to disconnect the fresh water hose to hook up this alternative water hose used only for this job). Do not turn on the water to this hose yet. Connect the sewer drainage hose to the RV (there is a permanent, lockable connector on the portion of the sewer hose that connects to the RV-twist it until hose is secured and locked in place.) Extend the other end of the sewer hose to the park’s sewer drain. Locate the “sewer adaptor elbow fitting” in your supplies and screw it into the park’s sewer drain, then twist on your sewer hose connector. (Note: if no screw-in connection is present in the RV park’s sewer pipe, press a “foam rubber sewer seal” into their sewer pipe, then press your sewer adaptor elbow fitting into the foam rubber sewer seal until secure.)
- Verify there is a level or downhill slope for your sewer hose from the RV to the park’s sewer drain. If not, you may have to lift the hose from the ground sequentially from the RV to the drain to get the sewage and water to drain out of your sewer hose completely before disconnection.
- Pull open the black water valve (this is a “blade valve” with a “T” handle that pulls outward to open) and leave the valve open until the sound of the water flow stops. Push the valve closed.
- Turn on the water to the Sewer Flusher Valve for 2 minutes. Turn off water.
- Repeat step 4.
- Repeat step 5 and 6 again. You have now “rinsed the tank” in steps 5. and 6. two times to ensure the tank is well rinsed.
- Pull open the grey water valve and leave it open until the sound of the flow stops. Push the valve closed. (this has rinsed your sewer hose with soapy water from your shower, sinks and washing machine.)
- YOU HAVE COMPLETED YOUR FIRST “DUMP”—CONGRATULATIONS!
Some hints:
- Keep a separate plastic box or two for the sewer hose, the sewer flusher valve hose, and various connectors mentioned above to keep these parts separate from other, “non-dirty” supplies.
- Always attend to and complete the process entirely—do not leave the draining or rinsing process unattended.
- Always confirm connections are secure PRIOR to opening black and grey valves.
- Always complete this dumping process after a camping trip BEFORE storing or parking your RV for an extended time to prevent evaporation of water in your tanks and hardening of its “components.”
From along the road,
Chris