

Bird and animal photography, especially in the wild, can be quite challenging.
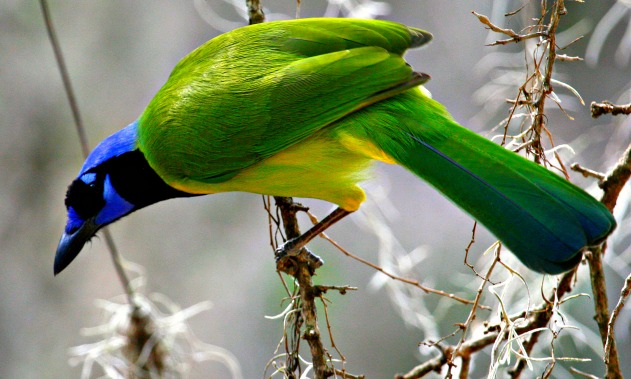
This image of a green jay was taken from a bird blind in Bentsen-Rio Grande State Park in South Texas. © Rex Vogel, all rights reserved
The name of the game in wildlife photography—whether you’re trying to capture an exotic bird in a national wildlife refuge or a giraffe in a city zoo or wildlife park—is patience.
Wild birds and animals will do what they’re going to do and no amount of coaxing will make them turn their head, look your way, open their mouth, do something cute, or move to better light.
You have to be there—and ready—when the photo op occurs. Be prepared to wait, and wait, and wait some more—it takes a long time to get good wildlife photos, even longer for great ones.
The best time for travel photography is either during the early morning or late afternoons and the same applies for birds and animals. Early morning is typically the best for wildlife photography because birds and animals are actively searching for food.
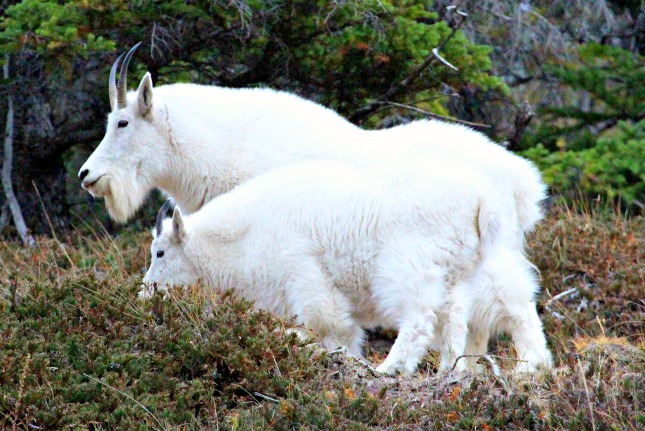
You have to shoot a lot of photos to manage one or two keepers. Pictured above Rocky Mountain Goats in the Canadian Rockies. © Rex Vogel, all rights reserved
Maintaining fast shutter speeds, especially for birds in flight and small birds that move very quickly is essential—you cannot fix motion blur in post production. You need to completely freeze the action of the bird. To achieve this, set your shutter speed in a range from 1/800 to 1/1600 or even faster for birds in flight.
A tripod or a monopod is highly recommended for early morning and late afternoon photography when slower shutter speeds are required due to less available light.
Always focus on the nearest (to the viewer) eye of the bird. It is acceptable to have a blurred tail or other parts of the bird, but at least one eye always needs to be in focus and sharp.
Choose your background carefully to achieve a smooth bokeh (or boke, a Japanese word meaning blur). An out-of-focus or blurry background is achieved by a shallow depth of field when relatively close to the subject while using a large aperture.
Get up close. Use a photo blind whenever possible. One of the best blinds is your RV or car; you’re able to get relatively close to a bird or animal without departing your vehicle.
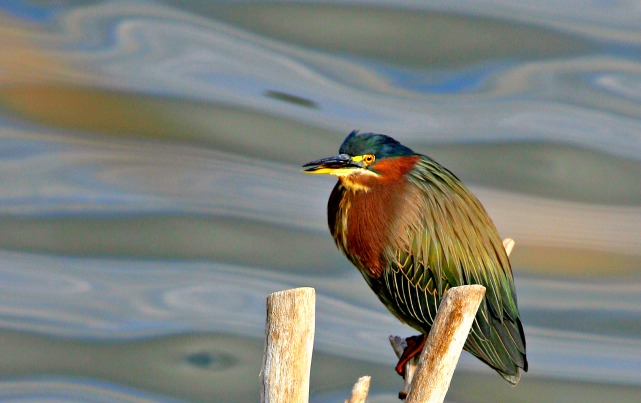
Notice the smooth bokeh and how the Rule of Thirds is used in placing of the green heron with space for the bird to move into the frame.© Rex Vogel, all rights reserved
You need a good telephoto lens to get close enough to make the image interesting. Zoom in and focus on the head of the bird or animal.
In general, good photos result from careful attention to some basic elements of composition—the placement of the objects in the photo. Frame your subject carefully, try to put the main point of attraction at 1/3 or 2/3 of the image (remember the rule of thirds).
When you’re in the wild, and happen across birds or animals, you need to be ready to capture the image—even if it’s at a distance. Have your telephoto lens ready. Nothing shouts louder “boring photo” more than a tiny subject in the frame, so move in closer. With wild animals such as bear or moose be sure to maintain a safe distance.
Photographing wildlife requires patience and skill. If you are a beginner, try easier subjects like robins or finches in your backyard or the park and birds in the zoo before heading out into the wild. You won’t get the perfect shot every time but with practice your photos will improve.