


Although there are many reasons for taking photographs, bird pictures are always popular. Capturing good photographs of birds can be difficult – most of them don’t stand still for very long, they fly away when you get close, and they are often small. Still, they are usually worth the challenge. What’s more, you don’t need to go any further than your back yard or RV site to find your subjects. Although a trip to the local bird sanctuary will sometimes offer a wider variety of subjects, there are plenty of interesting birds almost everywhere.
Some suggestions that may help improve your photographs of birds:
-
- I have never had a bird photographer tell me their telephoto lens was too long. Although you can use any lens to take photos of birds, a long telephoto lets you stay far enough away so that you don’t spook them. It also allows you to fill the image with the bird rather than having it end up so small a part of the composition that it loses punch. For DX sized sensors (most consumer DSLRs), a minimum of a 200mm lens is recommended, and a 400mm or 500mm preferred. These will be big, heavy and expensive lenses, but will be a tremendous advantage. For the point & shoot users, consider a camera with a large zoom range. Zoom ranges up to 24X are available – for example, the New Nikon Coolpix P90 has a range of 26mm to 624mm (35mm equivalent). Canon, Olympus, and others all make cameras that have long telephoto ranges, although they tend to be the SLR like versions, not compact cameras.
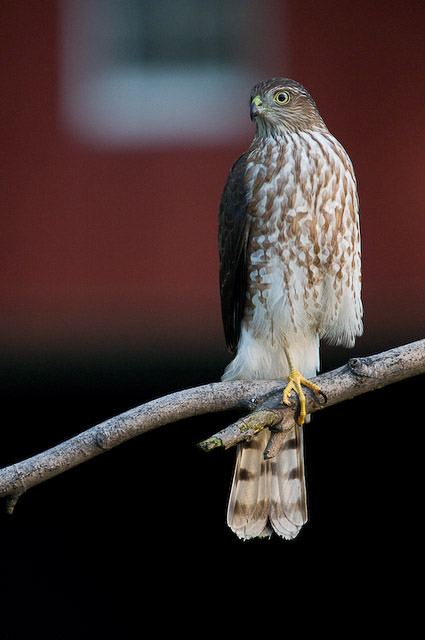
- No matter what camera you use, a tripod will improve your images. Even lenses or cameras that have built-in vibration reduction (VR or IS) are difficult to hand hold at a 35mm equivalent over 300mm. If you have a choice, a ball head will be easier to use than the traditional pan head on your tripod.

- Another consideration for backgrounds – try to keep them out of focus. This often requires large lens openings to limit the depth of field. The advantage of this is faster shutter speeds, limiting blur. The disadvantage – telephoto lenses with large apertures (for example, f: 2.8) are very expensive.
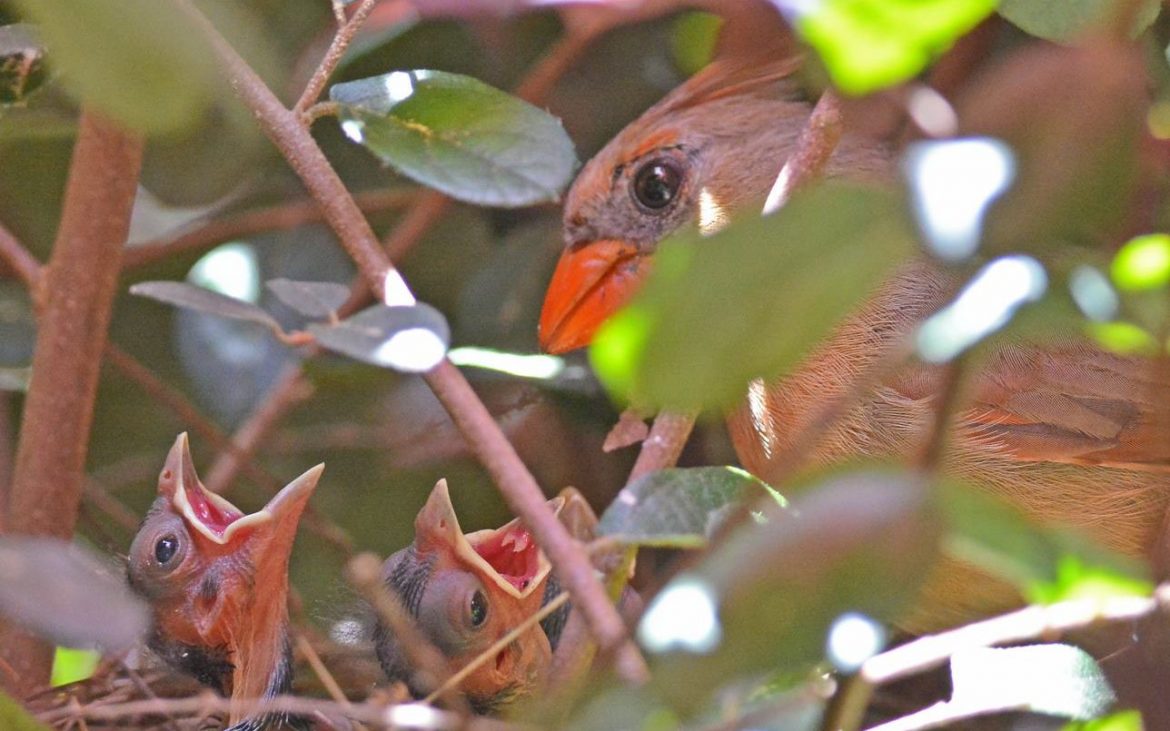
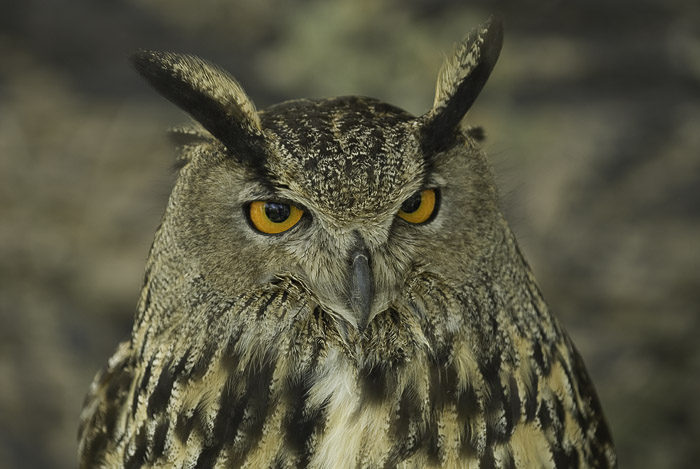
- Try to include a catch light in the bird’s eye. To do that you either need the sun in the right location or use a flash. Although most on-camera flashes and even large external units are not powerful enough to illuminate a bird 100′ or more away, you can add a Better Beamer to your external flash & extend its range 2 or 3 fold. Another possibility is to mount the external flash near the location you expect the bird to land & fire it remotely. Depending on your camera & flash this may be simple and inexpensive – the camera flash fires the remote flash head or may require a radio controlled remote. In most cases, the eye is also where you should locate your focus. Although a completely focused bird is usually best, an image that has soft focused eyes generally does not work.
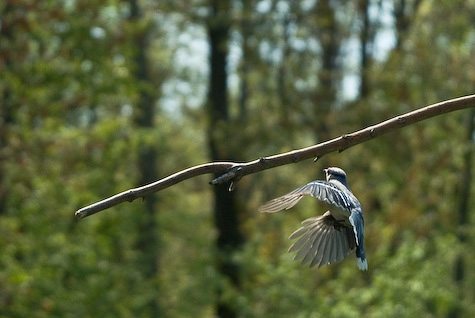
- If you want to capture birds in flight (often abbreviated as BIF) you will need fast shutter speeds or flash. For long lenses, VR is a big advantage – unless you are willing to spend $500.00 for a gimbal head, it is difficult to use a tripod to follow moving birds. Photographing BIF are definitely a good way to improve your camera skills. Just be willing to throw away many more images than you keep!
So, the next time you are thinking of something to photograph, try your back yard!